React
- React
- React
- React General Resources
- React Community
- React Online Playgrounds
- Another Awesome Lists
- React Tutorials
- React General Tutorials
- React Hooks
- React and TypeScript
- React Performance
- React Internals
- React Interview Questions
- React Tools
- React Development Tools
- React Starter Kits and Toolchains
- React Frameworks
- React Styling
- React Routing
- React Component Libraries
- React Awesome Components
- React Testing
- React Libraries
- React Integration
- React State Management
- React AR and VR
- React Renderers
- Forms
- Autocomplete
- Graphics
- Data Managing
- Maps
- Charts
- React Native
- React Native General Resources
- React Native Tutorials
- React Native Development Tools
- React Native Sample Apps
- React Native Boilerplates
- React Native Awesome Components
- React Native Libraries
- Redux
- Redux General Resources
- Redux Tools
- Redux Tutorials
- GraphQL
- GraphQL General Resources
- GraphQL Tools
- GraphQL Tutorials
- GraphQL Implementations
- Database Integration
- Relay
- Relay General Resources
- Relay Tutorials
- Relay Tools
- Videos
- reactjsvideos.com
- Important Talks
- React.js Conf 2015 Playlist
- ReactEurope Conf 2015 Day 1 Playlist
- ReactEurope Conf 2015 Day 2 Playlist
- ReactRally Conf 2015 Playlist
- React.js Conf 2016 Playlist
- React Amsterdam 2016 Playlist
- ReactEurope Conf 2016 Day 1 Playlist
- ReactEurope Conf 2016 Day 2 Playlist
- ReactRally Conf 2016 Playlist
- React Conf 2017 Playlist
- React.js Amsterdam 2018 Playlist
- React Amsterdam 2019 Playlist
- Video Tutorials
- Demo React Apps
- Real React Apps
- React Overview:
- Hello World
- The smallest React example looks like this:
- How to Read This Guide
- Knowledge Level Assumptions
- Introducing JSX
- Consider this variable declaration:
- Why JSX?
- Embedding Expressions in JSX
- JSX is an Expression Too
- Specifying Attributes with JSX
- Specifying Children with JSX
- JSX Prevents Injection Attacks
- JSX Represents Objects
- Rendering Elements
- Elements are the smallest building blocks of React apps.
- Rendering an Element into the DOM
- Updating the Rendered Element
- React Only Updates What’s Necessary
- Components and Props
- Components let you split the UI into independent, reusable pieces, and think about each piece in isolation. This page provides an introduction to the idea of components. You can find a detailed component API reference here.
- Function and Class Components
- Rendering a Component
- Composing Components
- Extracting Components
- Props are Read-Only
- State and Lifecycle
- This page introduces the concept of state and lifecycle in a React component. You can find a detailed component API reference here.
- Converting a Function to a Class
- Adding Local State to a Class
- Adding Lifecycle Methods to a Class
- Using State Correctly
- Do Not Modify State Directly
- State Updates May Be Asynchronous
- State Updates are Merged
- The Data Flows Down
- Handling Events
- Handling events with React elements is very similar to handling events on DOM elements. There are some syntax differences:
- Passing Arguments to Event Handlers
- Conditional Rendering
- In React, you can create distinct components that encapsulate behavior you need. Then, you can render only some of them, depending on the state of your application.
- Element Variables
- Inline If with Logical && Operator
- Inline If-Else with Conditional Operator
- Preventing Component from Rendering
- Lists and Keys
- First, let’s review how you transform lists in JavaScript.
- Rendering Multiple Components
- Basic List Component
- Keys
- Extracting Components with Keys
- Keys Must Only Be Unique Among Siblings
- Embedding map() in JSX
- Forms
- HTML form elements work a bit differently from other DOM elements in React, because form elements naturally keep some internal state. For example, this form in plain HTML accepts a single name:
- Controlled Components
- The textarea Tag
- The select Tag
- The file input Tag
- Handling Multiple Inputs
- Controlled Input Null Value
- Alternatives to Controlled Components
- Fully-Fledged Solutions
- Lifting State Up
- Often, several components need to reflect the same changing data. We recommend lifting the shared state up to their closest common ancestor. Let’s see how this works in action.
- Adding a Second Input
- Writing Conversion Functions
- Lifting State Up
- Lessons Learned
- Composition vs Inheritance
- React has a powerful composition model, and we recommend using composition instead of inheritance to reuse code between components.
- Containment
- Specialization
- So What About Inheritance?
- Thinking in React
- React is, in our opinion, the premier way to build big, fast Web apps with JavaScript. It has scaled very well for us at Facebook and Instagram.
- Start With A Mock
- Step 1: Break The UI Into A Component Hierarchy
- Step 2: Build A Static Version in React
- A Brief Interlude: Props vs State
- Step 3: Identify The Minimal (but complete) Representation Of UI State
- Step 4: Identify Where Your State Should Live
- Step 5: Add Inverse Data Flow
- And That’s It
- A visual guide to React Mental models
- the-rendering-mental-model-understanding-reacts-magic
React
JavaScript Library for building User Interfaces
React General Resources
React Community
React Online Playgrounds
Another Awesome Lists
React Tutorials
React General Tutorials
- React Official Tutorial
- Using React in Visual Studio Code
- Scrimba - Learn React for free interactively
- FreeCodeCamp React Challenges
- React Cheatsheet
- React Patterns
- Setup Flow with React
React Hooks
- React Hooks
- Awesome React Hooks
- Thinking in React Hooks
- Replacing Redux with React Hooks and Context
- React Hooks cheat sheet: Unlock solutions to common problems
- How to fetch data with React Hooks?
- Easy to understand React Hook recipes
- React Hooks Video Tutorial
React and TypeScript
- TypeScript, React and Webpack
- JSX in TypeScript
- Cheatsheets for experienced React developers getting started with TypeScript
- React by Example
React Performance
- React Optimizing Performance
- Introducing the React Profiler
- Optimizing React: Virtual DOM explained
- A Definitive Guide to Optimize Major Performance issues in React
- Twitter Lite and High Performance React Progressive Web Apps at Scale
- Using the React DevTools Profiler to Diagnose React App Performance Issues
- Top 5 Practices to Boost React Performance
- React is Slow, React is Fast: Optimizing react Apps in Practice
- Rendering large lists with react-window
React Internals
- Reconciliation
- React Fiber Architecture
- Build your own React
- Inside Fiber: In-depth overview of the new reconciliation algorithm in React
- Entire React code base explanation by visual block schemes
React Interview Questions
- 13 Essential React Interview Questions
- List of React interview Questions and Answers
- React Coding Challenges
React Tools
React Development Tools
- react-devtools - Inspection of React component hierarchy in the Chrome and Firefox Developer Tools
- react-hot-loader - Tweak React components in real time
- react-loadable - A higher order component for loading components with promises
- loadable-components - React code splitting made easy
- reactotron - A desktop app for inspecting your React and React Native projects
- storybook - UI component dev & test
- docz - Zero Config, live-reloading documentation with Markdown + JSX
- react-styleguidist - Isolated React component development environment with a living style guide
- react-cosmos - Dev tool for creating reusable React components
- eslint-plugin-react - React specific linting rules for ESLint
- eslint-plugin-jsx-a11y - Static AST checker for a11y rules on JSX elements
- @axe-core/react - Accessibility auditing for React applications
- DataFormsJS JSX Loader - Small JavaScript Compiler for quickly converting JSX to JS directly on a web page
- Why Did You Render - Monkey patches React to notify you about avoidable re-renders.
- Divjoy - React codebase and UI generator to speed up development (paid)
- Plasmic - Powerful design tool for building your React components visually.
React Starter Kits and Toolchains
- create-react-app - Set up a modern Web app by running one command
- Razzle - Build production ready React applications. Razzle is toolchain for modern static and dynamic websites and web applications
- Neutrino React Preset -
@neutrinojs/reactis a Neutrino preset that supports building React web applications - react-starter-kit - Isomorphic Web app boilerplate
- create-react-library - CLI for creating reusable, modern React libraries using Rollup and create-react-app.
- tsdx - Zero-config CLI for TypeScript package development
React Frameworks
- next.js - The React Framework
- gatsby.js - Free and open source framework based on React
- react-admin - Frontend Framework for building B2B applications on top of REST/GraphQL APIs
- remix - Finally, a killer React framework from the creators of React Router
- Blitz - The Fullstack React Framework
- aleph.js - The React Framework in Deno
React Styling
- styled-components - Visual primitives for the component age
- emotion - Library designed for writing CSS styles with JavaScript
- radium - A toolchain for React component styling
- jss - Authoring tool for CSS
- aphrodite - Framework-agnostic CSS-in-JS with support for server-side rendering, browser prefixing, and minimum CSS generation
React Routing
- react-router - Declarative routing for React
- navi - Declarative, asynchronous routing for React
- curi - JavaScript router for single-page applications
- reach - Next Generation Routing for React
- universal-router - A simple middleware-style router for isomorphic JavaScript web apps
- wouter - A minimalist-friendly ~1.3KB routing library
React Component Libraries
- material-ui - React components for faster and easier web development
- blueprint - A React-based UI toolkit for the webs
- Fluent UI - A set of React components for building Microsoft web experiences
- react-bootstrap - Bootstrap components built with React
- reactstrap - Simple React Bootstrap 4 components
- ant-design - A design system with values of Nature and Determinacy
- chakra-ui - Simple, Modular & Accessible UI Components for your React Applications
- semantic-ui-react - The official Semantic-UI-React integration
- evergreen - Evergreen React UI Framework by Segment
- grommet - A react-based framework that provides accessibility, modularity, responsiveness, and theming in a tidy package
- rebass - React primitive UI components built with styled-system
- reakit - Accessible, Composable and Customizable components for React
- rsuite - A suite of React components
- atlaskit - Atlassian’s official UI library, built according to the Atlassian Design Guidelines.
- baseweb - Base Web is a foundation for initiating, evolving, and unifying web products.
- primereact - A complete UI Framework for React with 50+ components featuring material, bootstrap and custom themes.
- eui - Elastic UI Framework
- react-spectrum - Adobe’s collection of libraries and tools that help you build adaptive, accessible, and robust user experiences
- ring-ui - JetBrains Web UI components
- react-bulma-components - React components for Bulma framework
- react-bulma - React.js components for Modern CSS framework based on Flexbox
- trunx - Super Saiyan React components, son of awesome Bulma, implemented in TypeScript
- bumbag-ui - Build accessible & themeable React applications with your Bumbag
React Awesome Components
- Awesome React Components list
- react-select - The Select Component for React
- react-beautiful-dnd - Beautiful and accessible drag and drop for lists with React
- react-dnd - Drag and Drop for React
- react-grid-layout - A draggable and resizable grid layout with responsive breakpoints
- react-table - A lightweight, fast and extendable datagrid for React
- react-data-grid - Excel-like grid component built with React
- react-draggable - React draggable component
- react-resizable-and-movable - A resizable and draggable component for React
- react-resizable - A simple React component that is resizable with a handle
- react-resizable-box - A resizable component for React
- react-searchbox-awesome - Minimalistic searchbox
- react-sortable-pane - A sortable and resizable pane component for React
- react-spaces - Nestable resizable, anchored, scrollable components
- react-dates - An easily internationalizable, mobile-friendly datepicker library for the web
- react-big-calendar - Calendar component
- react-datepicker - ReactJS Datepicker
- react-list - A versatile infinite scroll React component
- react-intl - Internationalize React apps
- react-i18next - Internationalization for React done right
- react-aria-modal - A fully accessible React modal
- react-hotkeys - Declarative hotkey and focus area management for React
- react-keydown - Lightweight keydown wrapper for React components
- react-joyride - Create guided tours for your apps
- react-virtualized - React components for efficiently rendering large lists and tabular data
- react-window - React components for efficiently rendering large lists and tabular data
- react-text-mask - Input mask for React
- react-loading-skeleton - Create skeleton screens that automatically adapt to your app
- react-spinkit - A collection of loading indicators animated with CSS for React
- rheostat - Accessible slider component built with React
- qrcode.react - QR component for use with React
- react-archer - Draw arrows between React elements
- react-pdf-viewer - A PDF viewer made for React
- react-parallax-tilt - Easily apply tilt hover effect on React components
- react-popper - Position tooltips and popovers in an elegant, performant manner
- react-tsparticles - Easily create highly customizable particles animations
- react-spring - Spring-physics based animation library for React applications
- framer-motion - A React library to power production-ready animations
- react-accessible-accordion - React Component for creating an ‘Accordion’ that adheres to the WAI ARIA spec for accessibility.
- react-truncate-markup - React component for truncating JSX markup.
- react-cookie - Universal cookies for React
- react-slick - Carousel component built with React
- react-gtm-module - Google Tag Manager Module for React
- react-device-detect - Detect device for React
- react-colorful - A tiny (2,5 KB), dependency-free, fast and accessible color picker component
- react-modal - Accessible modal dialog component for React
- cleave.js - Format input text content when you are typing
- react-fontawesome - Font Awesome 5 React component
React Testing
- jest - Delightful JavaScript Testing Framework
- enzyme - JavaScript Testing utilities for React
- react-testing-library - Simple and complete React DOM testing utilities
- react-hooks-testing-library - React hooks testing utilities that encourage good testing practices
- majestic - Zero config GUI for Jest
React Libraries
- react-border-wrapper - A wrapper for placing elements along div borders in React.
- react-magic - Automatically AJAXify plain HTML with the power of React
- react-toolbox - A set of React components implementing Google’s Material Design specification
- tcomb-react - Library allowing you to check all the props of your React components
- react-responsive - Media queries in react for responsive design
- preact - Fast 3kb React alternative with the same ES6 API.
- riotjs - A React-like, 3.5KB user interface library
- Maple.js - Bringing the concept of web-components to React
- react-i13n - A performant, scalable and pluggable approach to instrumenting your React application
- react-icons - svg react icons of popular icon packs
- react-open-doodles - Awesome free illustrations as react components.
- Keo - Plain functions for a more functional Deku approach to creating React components, with functional goodies such as pipe, memoize, etc…
- Bit - A virtual repository for managing and using react and other web components across applications
- AtlasKit - Atlassian’s React UI library
- ReactiveSearch - UI components library for Elasticsearch
- Slate - A completely customizable framework for building rich text editors.
- react-json-schema - Construct React elements from JSON by mapping JSON definitions to React components that you expose.
- react-lodash - Lodash as React components
- react-helmet - A document head manager for React
- react-snap - Zero-configuration framework-agnostic static prerendering for SPAs
- Draft.js - A React framework for building text editors
- refract - Harness the power of reactive programming to supercharge your components
- react-desktop - OS X and Windows UI components built with React
- reapop - A simple and customizable React notifications system
- react-extras - Useful components and utilities for working with React
- react-instantsearch - Lightning-fast search for React and React Native applications, by Algolia
- uppy - The next open source file uploader for web browsers
- react-motion - A spring that solves your animation problems
- react-esi - React Edge Side Includes
- react-aria - Adobe’s library of React Hooks that provides accessible UI primitives for your design system
- react-uploady - Modern file-upload components & hooks for React.
React Integration
- ReasonReact
- React Rails
- ReactJS.NET
- om - ClojureScript interface
- Reagent - A minimalistic ClojureScript interface to React.js
- Express React views
- React Page Middleware
- ngReact - React Components in Angular
- coffee-react-transform - Provides React JSX support for Coffeescript
- sprockets-coffee-react - Sprockets preprocessor for CJSX
- react-kup - A simple, non-intrusive alternative to jsx for coffeescript
- turbo-react - Combine Turbolinks and React to apply DOM diffs
- react-bacon - A little module for using React with Bacon.js
- msx - React’s JSX Transformer, tweaked to output calls to Mithril
- react-backbone - Backbone-aware mixins for react
- NestedReact - transparent integration with Backbone Views and NestedTypes models
- backbone-reaction - React, Backbone and then some
- react.backbone - Plugin for React to make Backbone migration easier
- reactbone - React extensions for Backbone
- backbone-react-ui - React components for use with backbone and backbone paginator
- react-events - Declarative managed event bindings for react components
- react-mixin-manager - React mixin registration manager
- react-topcoat by @plaxdan - Topcoat CSS components built with the React library
- react-topcoat by @arnemart - A collection of React components for Topcoat
- reactdown - Write React components using markdown syntax
- react-jade - Compile Jade to React JavaScript
- jade-react - Compile Jade templates to React.DOM expressions
- gulp-jade-react - Compile Jade templates into React de-sugared JSX with Gulp
- sbt-reactjs - React SBT Plugin using npm
- scalajs-react - A guilty affair between Scala.js and Facebook’s React
- react-xtags - Using React to implement xtags
- jreact - React on server-side Java (with Rhino or Nashorn)
- React.hiccup - A complete replacement for JSX written in sweet.js
- react-play - Rendering React components in the Play Framework with JDK8’s Nashorn
- rx-react - Utilities to works with React in a RxJS
- react-with-di - A hacked prototype of React.js with DI
- reactfire - ReactJS mixin for easy Firebase integration
- react-clickdrag-mixin - ClickDrag mixin for React component
- react-masonry-mixin - Standalone mixin for Masonry (@desandro)
- react-packery-mixin - Standalone mixin for Packery (Metafizzy)
- react-dropzone - Simple HTML5 drag-drop zone with React.js.
- aframe-react - A-Frame VR + React
- react-three-fiber - A react reconciler for threejs (web and react-native)
- react-three - React bindings to create and control a 3D scene using three.js
- react-three-renderer - Render into a three.js canvas using React
- react-threejs - Simplest bindings between React & Three.js
- react-masonry-css - Fast Masonry layout powered by CSS, dependency free
- react-captcha - A react.js reCAPTCHA for Google
- reaptcha - Clean, modern and simple React wrapper for Google reCAPTCHA
- react-recaptcha-that-works - A reCAPTCHA bridge for React that works
React State Management
- redux - Predictable State Container for JavaScript Apps
- mobx - Simple, scalable state management
- react-query
- flux - Application architecture for building user interfaces
- recoil - Experimental state management library for React apps
- xstate-react - State machines and statecharts for the modern web
- zustand - Bear necessities for state management in React
- easy-peasy - Vegetarian friendly state for React
- hookstate - The simple but very powerful and incredibly fast state management for React that is based on hooks
- effector - Fast and powerful reactive state manager
- reactn - React, but with built-in global state management
React AR and VR
- Viro React - Platform for rapidly building AR/VR applications using React Native
React Renderers
- react-three-fiber - A React renderer for Three.js
- react-pdf - Create PDF files using React
- ink - React for interactive command-line apps
- react-blessed - A React renderer for blessed terminal interface library
- react-sketchapp - Render React components to Sketch
- react-figma - A React renderer for Figma
- react-nil - A react null renderer
- remotion - Create videos programmatically in React
Forms
- formik - Build forms in React, without the tears
- react-hook-form - React Hooks for forms validation
- react-jsonschema-form - A React component for building Web forms from JSON Schema
- react-final-form - High performance subscription-based form state management for React
- unform - Performance-focused API for React forms
- formily - Alibaba Group Unified Form Solution
- uniforms - A React library for building forms from any schema
- formsy-react - A form input builder and validator for React
- react-formal - Sophisticated HTML form management for React
Autocomplete
- react-autocomplete by @rackt - WAI-ARIA compliant React autocomplete (Archived, read-only)
- react-autosuggest by @moroshko - WAI-ARIA compliant React autosuggest component
- react-autocomplete by @eliseumds - Just tasting some ReactJS + RxJS
- react-autocomplete by @prometheusresearch - Autocomplete widget based on React
- instatype by @gragland - Simple react autocomplete component
- downshift - 🏎 Primitives to build simple, flexible, WAI-ARIA compliant enhanced input React components
- React Bootstrap Typeahead - A React-based typeahead that relies on Bootstrap for styling and was originally inspired by Twitter’s typeahead.js.
Graphics
- react-art - React Bridge to the ART Drawing Library
- react-canvas - High performance
<canvas>rendering for React components - react-famous - Complex 3D animations UI at 60 FPS with Famo.us
- react-kinetic - HTML5 Canvas via KineticJS using React
- react-svg-morph - morph your svg components one into another
- react-hooks-svgdrawing - SVG Drawing with React hooks
- react-svg-pan-zoom - A React component that adds pan and zoom features to SVG.
Data Managing
- immer - Create the next immutable state by mutating the current one
- ReSub - A library for writing better React components and data stores
- immutable-js - Immutable Data Collections for Javascript
- baobab - JavaScript & TypeScript persistent and optionally immutable data tree with cursors
- WatermelonDB - 🍉 Reactive & asynchronous database for powerful React and React Native apps ⚡️
- RxDB - A realtime Database for JavaScript Applications
Maps
- react-googlemaps - React interface to Google maps
- react-maps - A map component for React
- react-google-maps - React.js Google Maps integration component
- react-gmaps - A Google Maps component for React.js
- react-map-gl - A React wrapper for MapboxGL-js plus overlay API
- google-map-react - Isomorphic google map React component
- react-mapbox-gl - A mapbox-gl-js wrapper to make the API react friendly
- google-maps-react - A declarative Google Map React component using React, lazy-loading dependencies, current-location finder and a test-driven approach by the Fullstack React team.
- react-leaflet - React components for Leaflet maps
- react-geo - A set of geo-related components using react, antd, and ol
- pigeon-maps - ReactJS maps without external dependencies
Charts
- vx - Visualization components
- victory - A collection of composable React components for building interactive data visualizations
- react-vis - Data Visualization Components
- recharts - Redefined chart library built with React and D3
- nivo - Provides a rich set of data visualization components, built on top of the D3 and React libraries
- echarts-for-react - Apache ECharts components for React wrapper
- react-apexcharts - React Component for ApexCharts
- chartify - React plugin for building charts using CSS
React Native
Framework for building native apps using React
React Native General Resources
- React Native Official Site
- React Native GitHub
- React Native Newsletter
- React Native Playground
- React Native Awesome List
- React Native StackOverflow
- React Native Radio
React Native Tutorials
- React Native Tutorial
- Introducing React Native: Building Apps with JavaScript
- Introduction to React Native: Building iOS Apps with JavaScript
- React Native Meets Async Functions
- Digital Smart Mirror lab with React Native
- The Beauty Of React Native: Building Your First iOS App With JavaScript (Part 1)
- The Beauty Of React Native: Building Your First iOS App With JavaScript (Part 2)
- A Mini-Course on React Native Flexbox
- A Complete Guide to Flexbox
- Test driving react native applications
- Using React Native With TypeScript
React Native Development Tools
- react-native-code-push - React Native module for CodePush
React Native Sample Apps
React Native Boilerplates
- Create React Native App - Create React Native apps that run on iOS, Android, and web
- Ignite - The hottest CLI for React Native, boilerplates, plugins, generators, and more!
React Native Awesome Components
- Expo - The Expo platform for making cross-platform mobile apps
- react-navigation - Routing and navigation for your React Native apps
- react-native-social-share - Use the iOS and Android native Twitter and Facebook share popup with React Native
- react-native-fbsdk - A wrapper around the iOS Facebook SDK
- react-native-side-menu - Simple customizable component to create side menu
- react-native-mapbox-gl - A Mapbox GL react native module
- react-native-icons - Quick and easy icons in React Native
- react-native-vector-icons - 3000 Customizable Icons for React Native with support for NavBar/TabBar
- react-native-google-signin - Google Signin for React Native
- react-native-picker-modal-view
- react-native-gifted-chat - The most complete chat UI for React Native
- react-native-fast-image - FastImage, performant React Native image component
- recyclerlistview - High performance listview for React Native and web!
- react-native-largelist - The best large list component for React Native
- react-native-gesture-handler - Declarative API exposing platform native touch and gesture system to React Native
- rn-placeholder - Display some placeholder stuff before rendering your text or media content in React Native
React Native Libraries
- sentry-react-native - Real-time crash reporting for your web apps, mobile apps, and games.
- realm-js - Realm is a mobile database: an alternative to SQLite & key-value stores
- react-native-device-info - Device Information for React Native iOS and Android
- react-native-react-bridge - A toolset to run React web app in React Native and handle communication between them.
- uncompress-react-native - Simple library to decompress files .zip, .rar, .cbz, .cbr in React Native.
Redux
Predictable State Container for JavaScript Apps
Redux General Resources
Redux Tools
- react-redux - Official React bindings for Redux
- redux-toolkit - The official, opinionated, batteries-included toolset for efficient Redux development
- redux-devtools - DevTools for Redux with hot reloading, action replay, and customizable UI
- reselect - Selector library for Redux
- redux-thunk - Thunk middleware for redux
- redux-saga - An alternative side effect model for Redux apps
- connected-react-router - A Redux binding for React Router
- redux-form - A Higher Order Component using react-redux to keep form state
- normalizr - Normalizes nested JSON according to a schema
- redux-observable - RxJS middleware for Redux
- redux-undo - Higher order reducer to add undo/redo functionality to redux state containers
- redux-persist - Persist and rehydrate a redux store
Redux Tutorials
- Redux Essentials
- Redux Fundamentals
- Fundamentals of Redux Course from Dan Abramov
- Building React Applications with Idiomatic Redux
GraphQL
A query language for your API
GraphQL General Resources
GraphQL Tools
- graphql-js - A reference implementation of GraphQL for JavaScript
- express-graphql - Create a GraphQL HTTP server with Express
- Apollo - Industry-standard GraphQL implementation
- GraphQL Playground - GraphQL IDE for better development workflows
GraphQL Tutorials
GraphQL Implementations
- graphql-ruby - Ruby implementation of GraphQL
- graphql-java - GraphQL Java implementation
- sangria - Scala GraphQL client and server library
- graphql-php - A PHP port of GraphQL reference implementation
- graphene - GraphQL framework for Python
- graphql-dotnet - GraphQL for .NET
- graphql-go - GraphQL for Go
- juniper - GraphQL server library for Rust
Database Integration
- Hasura - Instant GraphQL for all your data
- Prisma - Next-generation ORM
for Node.js and TypeScript - graphql-sequelize - GraphQL & Relay for MySQL & Postgres via Sequelize
Relay
Data-Driven React Applications
Relay General Resources
Relay Tutorials
- Official Relay Getting Started
- Relay for Visual Learners
- Getting Started with Relay
- Relay and Routing
Relay Tools
- graphql-relay-js - A library to help construct a graphql-js server supporting react-relay
- react-router-relay - Relay integration for React Router
- relay-local-schema - Use Relay without a GraphQL server
- relay-codemod - Codemod scripts based for on jsodeshift to update Relay APIs
Videos
reactjsvideos.com
Important Talks
- Pete Hunt: React: Rethinking best practices - JSConf EU 2013
- Pete Hunt: React: Rethinking Best Practices (updated) - JSConf.Asia 2013
- Tom Occhino and Jordan Walke: JS Apps at Facebook - JSConfUS 2013
- React: CSS in JS
- Pete Hunt: Be Predictable, Not Correct - Mountain West JavaScript 2014
- Hacker Way: Rethinking Web App Development at Facebook
- Christopher Chedeau: Why does React Scale? - JSConf2014
- Christopher Chedeau: React’s Architecture - OSCON 2014
- Pete Hunt: React RESTful UI Rendering - Strange Loop 2014
- Pete Hunt: How Instagram.com Works - OSCON 2014
- Bill Fisher and Jing Chen: React and Flux - NewCircle Training 2014
- Sebastian Markbage: Minimal API Surface Area - JSConf EU 2014
- Avik Chaudhuri: JavaScript Testing and Static Type Systems at Scale - Scale 2014
- React Native & Relay: Bringing Modern Web Techniques to Mobile - f8 2015)
- Citrusbyte Presents GraphQL: A Horizontal Platform with Nick Schrock
- Laney Kuenzel: Mutations and Subscriptions in Relay - JSConf 2015
- React Today and Tomorrow and 90% Cleaner React With Hooks - React Conf 2018
- React Conferences
- React Videos
- Awesome React Talks
React.js Conf 2015 Playlist
ReactEurope Conf 2015 Day 1 Playlist
ReactEurope Conf 2015 Day 2 Playlist
ReactRally Conf 2015 Playlist
React.js Conf 2016 Playlist
React Amsterdam 2016 Playlist
ReactEurope Conf 2016 Day 1 Playlist
ReactEurope Conf 2016 Day 2 Playlist
ReactRally Conf 2016 Playlist
React Conf 2017 Playlist
React.js Amsterdam 2018 Playlist
React Amsterdam 2019 Playlist
Video Tutorials
Demo React Apps
- hackernews-react-graphql - Hacker News clone rewritten with universal JavaScript, using React and GraphQL
- react-reduction - Free Admin Template Built with React and Bootstrap4
- reactjs-tmdb-app - Responsive React The Movie Database App
- react-shopping-cart - Simple ecommerce cart application built with React Redux
Real React Apps
- kibana - Your window into the Elastic Stack
- firefox debugger - The Firefox debugger that works anywhere
- spectrum – Simple, powerful online communities
- mattermost - Open source Slack alternative
- overreacted - Personal blog by Dan Abramov
- winamp2-js - Winamp 2 reimplemented for the browser
- dnote - A command line notebook with multi-device sync and web interface
React Overview:
Hello World
The smallest React example looks like this:
ReactDOM.render(
  <h1>Hello, world!</h1>,
  document.getElementById('root')
);
It displays a heading saying “Hello, world!” on the page.
https://codepen.io/bgoonz/pen/wveBJBM
Click the link above to open an online editor. Feel free to make some changes, and see how they affect the output. Most pages in this guide will have editable examples like this one.
How to Read This Guide
In this guide, we will examine the building blocks of React apps: elements and components. Once you master them, you can create complex apps from small reusable pieces.
TipThis guide is designed for people who prefer learning concepts step by step. If you prefer to learn by doing, check out our practical tutorial. You might find this guide and the tutorial complementary to each other.
This is the first chapter in a step-by-step guide about main React concepts. You can find a list of all its chapters in the navigation sidebar. If you’re reading this from a mobile device, you can access the navigation by pressing the button in the bottom right corner of your screen.
Every chapter in this guide builds on the knowledge introduced in earlier chapters. You can learn most of React by reading the “Main Concepts” guide chapters in the order they appear in the sidebar. For example, “Introducing JSX” is the next chapter after this one.
Knowledge Level Assumptions
React is a JavaScript library, and so we’ll assume you have a basic understanding of the JavaScript language. If you don’t feel very confident, we recommend going through a JavaScript tutorial to check your knowledge level and enable you to follow along this guide without getting lost. It might take you between 30 minutes and an hour, but as a result you won’t have to feel like you’re learning both React and JavaScript at the same time.
NoteThis guide occasionally uses some newer JavaScript syntax in the examples. If you haven’t worked with JavaScript in the last few years, these three points should get you most of the way.
Introducing JSX
Consider this variable declaration:
const element = <h1>Hello, world!</h1>;
This funny tag syntax is neither a string nor HTML.
It is called JSX, and it is a syntax extension to JavaScript. We recommend using it with React to describe what the UI should look like. JSX may remind you of a template language, but it comes with the full power of JavaScript.
JSX produces React “elements”. We will explore rendering them to the DOM in the next section. Below, you can find the basics of JSX necessary to get you started.
Why JSX?
React embraces the fact that rendering logic is inherently coupled with other UI logic: how events are handled, how the state changes over time, and how the data is prepared for display.
Instead of artificially separating technologies by putting markup and logic in separate files, React separates concerns with loosely coupled units called “components” that contain both. We will come back to components in a further section, but if you’re not yet comfortable putting markup in JS, this talk might convince you otherwise.
React doesn’t require using JSX, but most people find it helpful as a visual aid when working with UI inside the JavaScript code. It also allows React to show more useful error and warning messages.
With that out of the way, let’s get started!
Embedding Expressions in JSX
In the example below, we declare a variable called name and then use it inside JSX by wrapping it in curly braces:
const name = 'Josh Perez';const element = <h1>Hello, {name}</h1>;
ReactDOM.render(
  element,
  document.getElementById('root')
);
You can put any valid JavaScript expression inside the curly braces in JSX. For example, 2 + 2, user.firstName, or formatName(user) are all valid JavaScript expressions.
In the example below, we embed the result of calling a JavaScript function, formatName(user), into an <h1> element.
function formatName(user) {
  return user.firstName + ' ' + user.lastName;
}

const user = {
  firstName: 'Harper',
  lastName: 'Perez'
};

const element = (
  <h1>    Hello, {formatName(user)}!  </h1>);

ReactDOM.render(
  element,
  document.getElementById('root')
);
https://codepen.io/bgoonz/pen/oNwgZgm
We split JSX over multiple lines for readability. While it isn’t required, when doing this, we also recommend wrapping it in parentheses to avoid the pitfalls of automatic semicolon insertion.
JSX is an Expression Too
After compilation, JSX expressions become regular JavaScript function calls and evaluate to JavaScript objects.
This means that you can use JSX inside of if statements and for loops, assign it to variables, accept it as arguments, and return it from functions:
function getGreeting(user) {
  if (user) {
    return <h1>Hello, {formatName(user)}!</h1>;  }
  return <h1>Hello, Stranger.</h1>;}
Specifying Attributes with JSX
You may use quotes to specify string literals as attributes:
const element = <div tabIndex="0"></div>;
You may also use curly braces to embed a JavaScript expression in an attribute:
const element = <img src={user.avatarUrl}></img>;
Don’t put quotes around curly braces when embedding a JavaScript expression in an attribute. You should either use quotes (for string values) or curly braces (for expressions), but not both in the same attribute.
Warning:Since JSX is closer to JavaScript than to HTML, React DOM uses camelCase property naming convention instead of HTML attribute names.For example, class becomes className in JSX, and tabindex becomes tabIndex.
Specifying Children with JSX
If a tag is empty, you may close it immediately with />, like XML:
const element = <img src={user.avatarUrl} />;
JSX tags may contain children:
const element = (
  <div>
    <h1>Hello!</h1>
    <h2>Good to see you here.</h2>
  </div>);
JSX Prevents Injection Attacks
It is safe to embed user input in JSX:
const title = response.potentiallyMaliciousInput;
// This is safe:
const element = <h1>{title}</h1>;
By default, React DOM escapes any values embedded in JSX before rendering them. Thus it ensures that you can never inject anything that’s not explicitly written in your application. Everything is converted to a string before being rendered. This helps prevent XSS (cross-site-scripting) attacks.
JSX Represents Objects
Babel compiles JSX down to React.createElement() calls.
These two examples are identical:
const element = (
  <h1 className="greeting">
    Hello, world!
  </h1>);
const element = React.createElement(
  'h1',
  {className: 'greeting'},
  'Hello, world!'
);
React.createElement() performs a few checks to help you write bug-free code but essentially it creates an object like this:
// Note: this structure is simplified
const element = {
  type: 'h1',
  props: {
    className: 'greeting',
    children: 'Hello, world!'
  }
};
These objects are called “React elements”. You can think of them as descriptions of what you want to see on the screen. React reads these objects and uses them to construct the DOM and keep it up to date.
We will explore rendering React elements to the DOM in the next section.
Tip:We recommend using the “Babel” language definition for your editor of choice so that both ES6 and JSX code is properly highlighted.
Rendering Elements
Elements are the smallest building blocks of React apps.
An element describes what you want to see on the screen:
const element = <h1>Hello, world</h1>;
Unlike browser DOM elements, React elements are plain objects, and are cheap to create. React DOM takes care of updating the DOM to match the React elements.
Note:One might confuse elements with a more widely known concept of “components”. We will introduce components in the next section. Elements are what components are “made of”, and we encourage you to read this section before jumping ahead.
Rendering an Element into the DOM
Let’s say there is a <div> somewhere in your HTML file:
<div id="root"></div>
We call this a “root” DOM node because everything inside it will be managed by React DOM.
Applications built with just React usually have a single root DOM node. If you are integrating React into an existing app, you may have as many isolated root DOM nodes as you like.
To render a React element into a root DOM node, pass both to [ReactDOM.render()](<https://reactjs.org/docs/react-dom.html#render>):
const element = <h1>Hello, world</h1>;
ReactDOM.render(element, document.getElementById('root'));
https://codepen.io/bgoonz/pen/mdwyWeb?editors=0010
It displays “Hello, world” on the page.
Updating the Rendered Element
React elements are immutable. Once you create an element, you can’t change its children or attributes. An element is like a single frame in a movie: it represents the UI at a certain point in time.
With our knowledge so far, the only way to update the UI is to create a new element, and pass it to [ReactDOM.render()](<https://reactjs.org/docs/react-dom.html#render>).
Consider this ticking clock example:
function tick() {
  const element = (
    <div>      <h1>Hello, world!</h1>      <h2>It is {new Date().toLocaleTimeString()}.</h2>    </div>);
  ReactDOM.render(element, document.getElementById('root'));}

setInterval(tick, 1000);
https://codepen.io/bgoonz/pen/eYRmvNy?editors=0010
It calls [ReactDOM.render()](<https://reactjs.org/docs/react-dom.html#render>) every second from a [setInterval()](<https://developer.mozilla.org/en-US/docs/Web/API/WindowTimers/setInterval>) callback.
Note:In practice, most React apps only call ReactDOM.render() once. In the next sections we will learn how such code gets encapsulated into stateful components.We recommend that you don’t skip topics because they build on each other.
React Only Updates What’s Necessary
React DOM compares the element and its children to the previous one, and only applies the DOM updates necessary to bring the DOM to the desired state.
You can verify by inspecting the last example with the browser tools:
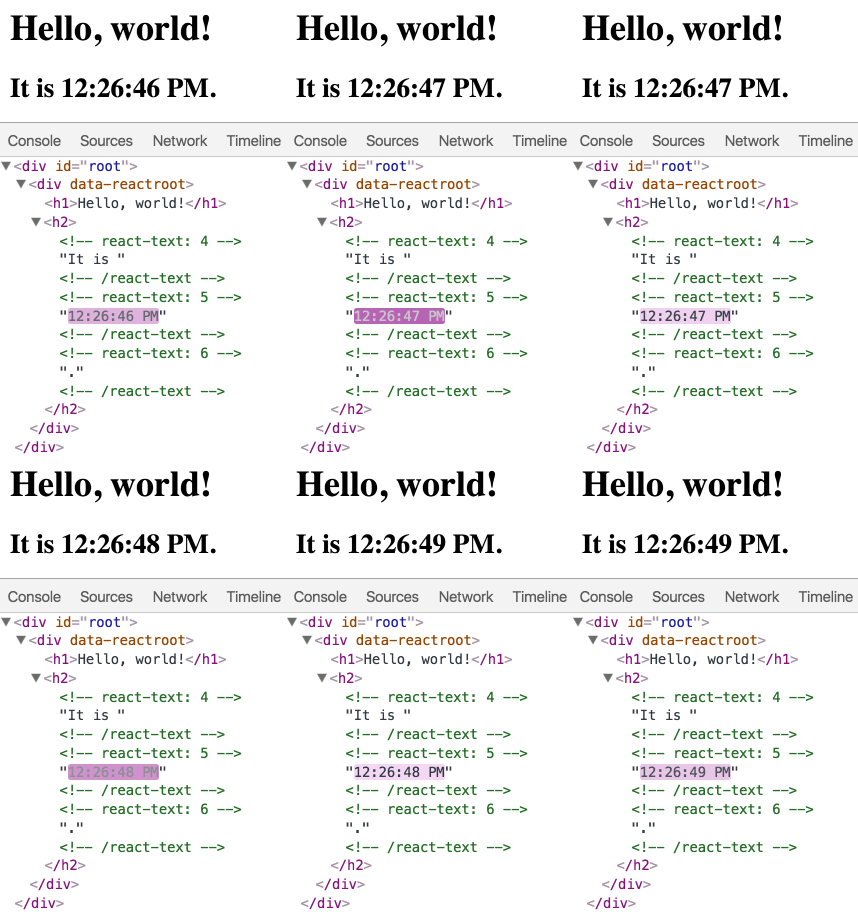
Even though we create an element describing the whole UI tree on every tick, only the text node whose contents have changed gets updated by React DOM.
In our experience, thinking about how the UI should look at any given moment, rather than how to change it over time, eliminates a whole class of bugs.
Components and Props
Components let you split the UI into independent, reusable pieces, and think about each piece in isolation. This page provides an introduction to the idea of components. You can find a detailed component API reference here.
Conceptually, components are like JavaScript functions. They accept arbitrary inputs (called “props”) and return React elements describing what should appear on the screen.
Function and Class Components
The simplest way to define a component is to write a JavaScript function:
function Welcome(props) {
  return <h1>Hello, {props.name}</h1>;
}
This function is a valid React component because it accepts a single “props” (which stands for properties) object argument with data and returns a React element. We call such components “function components” because they are literally JavaScript functions.
You can also use an ES6 class to define a component:
class Welcome extends React.Component {
  render() {
    return <h1>Hello, {this.props.name}</h1>;
  }
}
The above two components are equivalent from React’s point of view.
Function and Class components both have some additional features that we will discuss in the next sections.
Rendering a Component
Previously, we only encountered React elements that represent DOM tags:
const element = <div />;
However, elements can also represent user-defined components:
const element = <Welcome name="Sara" />;
When React sees an element representing a user-defined component, it passes JSX attributes and children to this component as a single object. We call this object “props”.
For example, this code renders “Hello, Sara” on the page:
function Welcome(props) {  return <h1>Hello, {props.name}</h1>;
}

const element = <Welcome name="Sara" />;ReactDOM.render(
  element,
  document.getElementById('root')
);
https://codepen.io/bgoonz/pen/QWgwpjd?editors=0010
Let’s recap what happens in this example:
- We call
ReactDOM.render()with the<Welcome name="Sara" />element. - React calls the
Welcomecomponent with{name: 'Sara'}as the props. - Our
Welcomecomponent returns a<h1>Hello, Sara</h1>element as the result. - React DOM efficiently updates the DOM to match
<h1>Hello, Sara</h1>.
Note: Always start component names with a capital letter.React treats components starting with lowercase letters as DOM tags. For example,
represents an HTML div tag, butrepresents a component and requires Welcome to be in scope.To learn more about the reasoning behind this convention, please read JSX In Depth.
Composing Components
Components can refer to other components in their output. This lets us use the same component abstraction for any level of detail. A button, a form, a dialog, a screen: in React apps, all those are commonly expressed as components.
For example, we can create an App component that renders Welcome many times:
function Welcome(props) {
  return <h1>Hello, {props.name}</h1>;
}

function App() {
  return (
    <div>      <Welcome name="Sara" />      <Welcome name="Cahal" />      <Welcome name="Edite" />    </div>);
}

ReactDOM.render(
  <App />,
  document.getElementById('root')
);
https://codepen.io/bgoonz/pen/LYLEWNq?editors=0010
Typically, new React apps have a single App component at the very top. However, if you integrate React into an existing app, you might start bottom-up with a small component like Button and gradually work your way to the top of the view hierarchy.
Extracting Components
Don’t be afraid to split components into smaller components.
For example, consider this Comment component:
function Comment(props) {
  return (
    <div className="Comment">
      <div className="UserInfo">
        <img className="Avatar"src={props.author.avatarUrl}alt={props.author.name}/>
        <div className="UserInfo-name">
          {props.author.name}
        </div>
      </div>
      <div className="Comment-text">
        {props.text}
      </div>
      <div className="Comment-date">
        {formatDate(props.date)}
      </div>
    </div>);
}
https://codepen.io/bgoonz/pen/PojwpzP?editors=0010
It accepts author (an object), text (a string), and date (a date) as props, and describes a comment on a social media website.
This component can be tricky to change because of all the nesting, and it is also hard to reuse individual parts of it. Let’s extract a few components from it.
First, we will extract Avatar:
function Avatar(props) {
  return (
    <img className="Avatar"      src={props.user.avatarUrl}      alt={props.user.name}    />  );
}
The Avatar doesn’t need to know that it is being rendered inside a Comment. This is why we have given its prop a more generic name: user rather than author.
We recommend naming props from the component’s own point of view rather than the context in which it is being used.
We can now simplify Comment a tiny bit:
function Comment(props) {
  return (
    <div className="Comment">      <div className="UserInfo">        <Avatar user={props.author} />        <div className="UserInfo-name">          {props.author.name}
        </div>      </div>      <div className="Comment-text">        {props.text}
      </div>      <div className="Comment-date">        {formatDate(props.date)}
      </div>    </div>);
}
Next, we will extract a UserInfo component that renders an Avatar next to the user’s name:
function UserInfo(props) { return ( <div className="UserInfo"> <Avatar user={props.user} /> <div className="UserInfo-name"> {props.user.name} </div> </div> ); }
This lets us simplify Comment even further:
function Comment(props) {
  return (
    <div className="Comment">      <UserInfo user={props.author} />      <div className="Comment-text">        {props.text}
      </div>      <div className="Comment-date">        {formatDate(props.date)}
      </div>    </div>);
}
https://codepen.io/bgoonz/pen/eYRmvzV?editors=0010
Extracting components might seem like grunt work at first, but having a palette of reusable components pays off in larger apps. A good rule of thumb is that if a part of your UI is used several times (Button, Panel, Avatar), or is complex enough on its own (App, FeedStory, Comment), it is a good candidate to be extracted to a separate component.
Props are Read-Only
Whether you declare a component as a function or a class, it must never modify its own props. Consider this sum function:
function sum(a, b) {
  return a + b;
}
Such functions are called “pure” because they do not attempt to change their inputs, and always return the same result for the same inputs.
In contrast, this function is impure because it changes its own input:
function withdraw(account, amount) {
  account.total -= amount;
}
React is pretty flexible but it has a single strict rule:
All React components must act like pure functions with respect to their props.
Of course, application UIs are dynamic and change over time. In the next section, we will introduce a new concept of “state”. State allows React components to change their output over time in response to user actions, network responses, and anything else, without violating this rule.
State and Lifecycle
This page introduces the concept of state and lifecycle in a React component. You can find a detailed component API reference here.
Consider the ticking clock example from one of the previous sections. In Rendering Elements, we have only learned one way to update the UI. We call ReactDOM.render() to change the rendered output:
function tick() {
  const element = (
    <div>      <h1>Hello, world!</h1>      <h2>It is {new Date().toLocaleTimeString()}.</h2>    </div>);
  ReactDOM.render(    element,    document.getElementById('root')  );}

setInterval(tick, 1000);
In this section, we will learn how to make the Clock component truly reusable and encapsulated. It will set up its own timer and update itself every second.
We can start by encapsulating how the clock looks:
function Clock(props) {
  return (
    <div>      <h1>Hello, world!</h1>      <h2>It is {props.date.toLocaleTimeString()}.</h2>    </div>  );
}

function tick() {
  ReactDOM.render(
    <Clock date={new Date()} />,    document.getElementById('root')
  );
}

setInterval(tick, 1000);
https://codepen.io/bgoonz/pen/powvegw?editors=0010
However, it misses a crucial requirement: the fact that the Clock sets up a timer and updates the UI every second should be an implementation detail of the Clock.
Ideally we want to write this once and have the Clock update itself:
ReactDOM.render(
  <Clock />,  document.getElementById('root')
);
To implement this, we need to add “state” to the Clock component.
State is similar to props, but it is private and fully controlled by the component.
Converting a Function to a Class
You can convert a function component like Clock to a class in five steps:
- Create an ES6 class, with the same name, that extends
React.Component. - Add a single empty method to it called
render(). - Move the body of the function into the
render()method. - Replace
propswiththis.propsin therender()body. - Delete the remaining empty function declaration.
class Clock extends React.Component {
  render() {
    return (
      <div>
        <h1>Hello, world!</h1>
        <h2>It is {this.props.date.toLocaleTimeString()}.</h2>
      </div>);
  }
}
https://codepen.io/bgoonz/pen/eYRmvJV?editors=0010
Clock is now defined as a class rather than a function.
The render method will be called each time an update happens, but as long as we render <Clock /> into the same DOM node, only a single instance of the Clock class will be used. This lets us use additional features such as local state and lifecycle methods.
Adding Local State to a Class
We will move the date from props to state in three steps:
- Replace
this.props.datewiththis.state.datein therender()method:
class Clock extends React.Component {
  render() {
    return (
      <div>        <h1>Hello, world!</h1>        <h2>It is {this.state.date.toLocaleTimeString()}.</h2>      </div>);
  }
}
- Add a class constructor that assigns the initial
this.state:
class Clock extends React.Component {
  constructor(props) {
    super(props);
    this.state = {date: new Date()};  }

  render() {
    return (
      <div>        <h1>Hello, world!</h1>        <h2>It is {this.state.date.toLocaleTimeString()}.</h2>      </div>);
  }
}
Note how we pass props to the base constructor:
 constructor(props) {
    super(props);    this.state = {date: new Date()};
  }
Class components should always call the base constructor with props.
- Remove the
dateprop from the<Clock />element:
ReactDOM.render(
  <Clock />,  document.getElementById('root')
);
We will later add the timer code back to the component itself.
The result looks like this:
class Clock extends React.Component {
  constructor(props) {    super(props);    this.state = {date: new Date()};  }render() {
    return (
      <div>        <h1>Hello, world!</h1>        <h2>It is {this.state.date.toLocaleTimeString()}.</h2>      </div>);
  }
}

ReactDOM.render(
  <Clock />,  document.getElementById('root')
);
https://codepen.io/bgoonz/pen/oNwgZbV?editors=0010
Next, we’ll make the Clock set up its own timer and update itself every second.
Adding Lifecycle Methods to a Class
In applications with many components, it’s very important to free up resources taken by the components when they are destroyed.
We want to set up a timer whenever the Clock is rendered to the DOM for the first time. This is called “mounting” in React.
We also want to clear that timer whenever the DOM produced by the Clock is removed. This is called “unmounting” in React.
We can declare special methods on the component class to run some code when a component mounts and unmounts:
class Clock extends React.Component {
  constructor(props) {
    super(props);
    this.state = {date: new Date()};
  }

  componentDidMount() {  }  componentWillUnmount() {  }render() {
    return (
      <div>        <h1>Hello, world!</h1>        <h2>It is {this.state.date.toLocaleTimeString()}.</h2>      </div>);
  }
}
These methods are called “lifecycle methods”.
The componentDidMount() method runs after the component output has been rendered to the DOM. This is a good place to set up a timer:
  componentDidMount() {
    this.timerID = setInterval(      () => this.tick(),      1000    );  }
Note how we save the timer ID right on this (this.timerID).
While this.props is set up by React itself and this.state has a special meaning, you are free to add additional fields to the class manually if you need to store something that doesn’t participate in the data flow (like a timer ID).
We will tear down the timer in the componentWillUnmount() lifecycle method:
  componentWillUnmount() {
    clearInterval(this.timerID);  }
Finally, we will implement a method called tick() that the Clock component will run every second.
It will use this.setState() to schedule updates to the component local state:
class Clock extends React.Component {
  constructor(props) {
    super(props);
    this.state = {date: new Date()};
  }

  componentDidMount() {
    this.timerID = setInterval(
      () => this.tick(),
      1000
    );
  }

  componentWillUnmount() {
    clearInterval(this.timerID);
  }

  tick() {    this.setState({      date: new Date()    });  }render() {
    return (
      <div>        <h1>Hello, world!</h1>        <h2>It is {this.state.date.toLocaleTimeString()}.</h2>      </div>);
  }
}

ReactDOM.render(
  <Clock />,
  document.getElementById('root')
);
Now the clock ticks every second.
Let’s quickly recap what’s going on and the order in which the methods are called:
- When
<Clock />is passed toReactDOM.render(), React calls the constructor of theClockcomponent. SinceClockneeds to display the current time, it initializesthis.statewith an object including the current time. We will later update this state. - React then calls the
Clockcomponent’srender()method. This is how React learns what should be displayed on the screen. React then updates the DOM to match theClock’s render output. - When the
Clockoutput is inserted in the DOM, React calls thecomponentDidMount()lifecycle method. Inside it, theClockcomponent asks the browser to set up a timer to call the component’stick()method once a second. - Every second the browser calls the
tick()method. Inside it, theClockcomponent schedules a UI update by callingsetState()with an object containing the current time. Thanks to thesetState()call, React knows the state has changed, and calls therender()method again to learn what should be on the screen. This time,this.state.datein therender()method will be different, and so the render output will include the updated time. React updates the DOM accordingly. - If the
Clockcomponent is ever removed from the DOM, React calls thecomponentWillUnmount()lifecycle method so the timer is stopped.
Using State Correctly
There are three things you should know about setState().
Do Not Modify State Directly
For example, this will not re-render a component:
// Wrong
this.state.comment = 'Hello';
Instead, use setState():
// Correct
this.setState({comment: 'Hello'});
The only place where you can assign this.state is the constructor.
State Updates May Be Asynchronous
React may batch multiple setState() calls into a single update for performance.
Because this.props and this.state may be updated asynchronously, you should not rely on their values for calculating the next state.
For example, this code may fail to update the counter:
// Wrong
this.setState({
  counter: this.state.counter + this.props.increment,
});
To fix it, use a second form of setState() that accepts a function rather than an object. That function will receive the previous state as the first argument, and the props at the time the update is applied as the second argument:
// Correct
this.setState((state, props) => ({
  counter: state.counter + props.increment
}));
We used an arrow function above, but it also works with regular functions:
// Correct
this.setState(function(state, props) {
  return {
    counter: state.counter + props.increment
  };
});
State Updates are Merged
When you call setState(), React merges the object you provide into the current state.
For example, your state may contain several independent variables:
  constructor(props) {
    super(props);
    this.state = {
      posts: [],      comments: []    };
  }
Then you can update them independently with separate setState() calls:
  componentDidMount() {
    fetchPosts().then(response => {
      this.setState({
        posts: response.posts      });
    });

    fetchComments().then(response => {
      this.setState({
        comments: response.comments      });
    });
  }
The merging is shallow, so this.setState({comments}) leaves this.state.posts intact, but completely replaces this.state.comments.
The Data Flows Down
Neither parent nor child components can know if a certain component is stateful or stateless, and they shouldn’t care whether it is defined as a function or a class.
This is why state is often called local or encapsulated. It is not accessible to any component other than the one that owns and sets it.
A component may choose to pass its state down as props to its child components:
<FormattedDate date={this.state.date} />
The FormattedDate component would receive the date in its props and wouldn’t know whether it came from the Clock’s state, from the Clock’s props, or was typed by hand:
function FormattedDate(props) {
  return <h2>It is {props.date.toLocaleTimeString()}.</h2>;
}
https://codepen.io/bgoonz/pen/GREgWEp?editors=0010
This is commonly called a “top-down” or “unidirectional” data flow. Any state is always owned by some specific component, and any data or UI derived from that state can only affect components “below” them in the tree.
If you imagine a component tree as a waterfall of props, each component’s state is like an additional water source that joins it at an arbitrary point but also flows down.
To show that all components are truly isolated, we can create an App component that renders three <Clock>s:
function App() {
  return (
    <div>      <Clock />      <Clock />      <Clock />    </div>);
}

ReactDOM.render(
  <App />,
  document.getElementById('root')
);
https://codepen.io/bgoonz/pen/YzQPZQK?editors=0010
Each Clock sets up its own timer and updates independently.
In React apps, whether a component is stateful or stateless is considered an implementation detail of the component that may change over time. You can use stateless components inside stateful components, and vice versa.
Handling Events
Handling events with React elements is very similar to handling events on DOM elements. There are some syntax differences:
- React events are named using camelCase, rather than lowercase.
- With JSX you pass a function as the event handler, rather than a string.
For example, the HTML:
<button onclick="activateLasers()">
  Activate Lasers
</button>
is slightly different in React:
<button onClick={activateLasers}>  Activate Lasers
</button>
Another difference is that you cannot return false to prevent default behavior in React. You must call preventDefault explicitly. For example, with plain HTML, to prevent the default form behavior of submitting, you can write:
<form onsubmit="console.log('You clicked submit.'); return false"><button type="submit">Submit</button></form>
In React, this could instead be:
function Form() {
  function handleSubmit(e) {
    e.preventDefault();    console.log('You clicked submit.');
  }

  return (
    <form onSubmit={handleSubmit}>      <button type="submit">Submit</button>    </form>);
}
Here, e is a synthetic event. React defines these synthetic events according to the W3C spec, so you don’t need to worry about cross-browser compatibility. React events do not work exactly the same as native events. See the [SyntheticEvent](<https://reactjs.org/docs/events.html>) reference guide to learn more.
When using React, you generally don’t need to call addEventListener to add listeners to a DOM element after it is created. Instead, just provide a listener when the element is initially rendered.
When you define a component using an ES6 class, a common pattern is for an event handler to be a method on the class. For example, this Toggle component renders a button that lets the user toggle between “ON” and “OFF” states:
class Toggle extends React.Component {
  constructor(props) {
    super(props);
    this.state = {isToggleOn: true};

    // This binding is necessary to make `this` work in the callback    this.handleClick = this.handleClick.bind(this);  }

  handleClick() {    this.setState(prevState => ({      isToggleOn: !prevState.isToggleOn    }));  }render() {
    return (
      <button onClick={this.handleClick}>        {this.state.isToggleOn ? 'ON' : 'OFF'}
      </button>);
  }
}

ReactDOM.render(
  <Toggle />,
  document.getElementById('root')
);
You have to be careful about the meaning of this in JSX callbacks. In JavaScript, class methods are not bound by default. If you forget to bind this.handleClick and pass it to onClick, this will be undefined when the function is actually called.
This is not React-specific behavior; it is a part of how functions work in JavaScript. Generally, if you refer to a method without () after it, such as onClick={this.handleClick}, you should bind that method.
If calling bind annoys you, there are two ways you can get around this. If you are using the experimental public class fields syntax, you can use class fields to correctly bind callbacks:
class LoggingButton extends React.Component {
  // This syntax ensures `this` is bound within handleClick.  // Warning: this is *experimental* syntax.  handleClick = () => {    console.log('this is:', this);  }render() {
    return (
      <button onClick={this.handleClick}>        Click me
      </button>);
  }
}
This syntax is enabled by default in Create React App.
If you aren’t using class fields syntax, you can use an arrow function in the callback:
class LoggingButton extends React.Component {
  handleClick() {
    console.log('this is:', this);
  }

  render() {
    // This syntax ensures `this` is bound within handleClick    return (      <button onClick={() => this.handleClick()}>        Click me
      </button>);
  }
}
The problem with this syntax is that a different callback is created each time the LoggingButton renders. In most cases, this is fine. However, if this callback is passed as a prop to lower components, those components might do an extra re-rendering. We generally recommend binding in the constructor or using the class fields syntax, to avoid this sort of performance problem.
Passing Arguments to Event Handlers
Inside a loop, it is common to want to pass an extra parameter to an event handler. For example, if id is the row ID, either of the following would work:
<button onClick={(e) => this.deleteRow(id, e)}>Delete Row</button><button onClick={this.deleteRow.bind(this, id)}>Delete Row</button>
The above two lines are equivalent, and use arrow functions and [Function.prototype.bind](<https://developer.mozilla.org/en-US/docs/Web/JavaScript/Reference/Global_objects/Function/bind>) respectively.
In both cases, the e argument representing the React event will be passed as a second argument after the ID. With an arrow function, we have to pass it explicitly, but with bind any further arguments are automatically forwarded.
Conditional Rendering
In React, you can create distinct components that encapsulate behavior you need. Then, you can render only some of them, depending on the state of your application.
Conditional rendering in React works the same way conditions work in JavaScript. Use JavaScript operators like [if](<https://developer.mozilla.org/en-US/docs/Web/JavaScript/Reference/Statements/if...else>) or the conditional operator to create elements representing the current state, and let React update the UI to match them.
Consider these two components:
function UserGreeting(props) {
  return <h1>Welcome back!</h1>;
}

function GuestGreeting(props) {
  return <h1>Please sign up.</h1>;
}
We’ll create a Greeting component that displays either of these components depending on whether a user is logged in:
function Greeting(props) {
  const isLoggedIn = props.isLoggedIn;
  if (isLoggedIn) {    return <UserGreeting />;  }  return <GuestGreeting />;}
ReactDOM.render(
  // Try changing to isLoggedIn={true}:
  <Greeting isLoggedIn={false} />,  document.getElementById('root'));
https://codepen.io/bgoonz/pen/mdwyWmJ?editors=0011
This example renders a different greeting depending on the value of isLoggedIn prop.
Element Variables
You can use variables to store elements. This can help you conditionally render a part of the component while the rest of the output doesn’t change.
Consider these two new components representing Logout and Login buttons:
function LoginButton(props) {
  return (
    <button onClick={props.onClick}>
      Login
    </button>);
}

function LogoutButton(props) {
  return (
    <button onClick={props.onClick}>
      Logout
    </button>);
}
In the example below, we will create a stateful component called LoginControl.
It will render either <LoginButton /> or <LogoutButton /> depending on its current state. It will also render a <Greeting /> from the previous example:
class LoginControl extends React.Component {
  constructor(props) {
    super(props);
    this.handleLoginClick = this.handleLoginClick.bind(this);
    this.handleLogoutClick = this.handleLogoutClick.bind(this);
    this.state = {isLoggedIn: false};
  }

  handleLoginClick() {
    this.setState({isLoggedIn: true});
  }

  handleLogoutClick() {
    this.setState({isLoggedIn: false});
  }

  render() {
    const isLoggedIn = this.state.isLoggedIn;
    let button;
    if (isLoggedIn) {      button = <LogoutButton onClick={this.handleLogoutClick} />;    } else {      button = <LoginButton onClick={this.handleLoginClick} />;    }return (
      <div>        <Greeting isLoggedIn={isLoggedIn} />        {button}      </div>);
  }
}

ReactDOM.render(
  <LoginControl />,
  document.getElementById('root')
);
While declaring a variable and using an if statement is a fine way to conditionally render a component, sometimes you might want to use a shorter syntax. There are a few ways to inline conditions in JSX, explained below.
Inline If with Logical && Operator
You may embed expressions in JSX by wrapping them in curly braces. This includes the JavaScript logical && operator. It can be handy for conditionally including an element:
function Mailbox(props) {
  const unreadMessages = props.unreadMessages;
  return (
    <div>      <h1>Hello!</h1>      {unreadMessages.length > 0 &&        <h2>          You have {unreadMessages.length} unread messages.        </h2>      }    </div>);
}

const messages = ['React', 'Re: React', 'Re:Re: React'];
ReactDOM.render(
  <Mailbox unreadMessages={messages} />,
  document.getElementById('root')
);
https://codepen.io/bgoonz/pen/VwWYppo?editors=0010
It works because in JavaScript, true && expression always evaluates to expression, and false && expression always evaluates to false.
Therefore, if the condition is true, the element right after && will appear in the output. If it is false, React will ignore and skip it.
Note that returning a falsy expression will still cause the element after && to be skipped but will return the falsy expression. In the example below, <div>0</div> will be returned by the render method.
render() {
  const count = 0;  return (
    <div>      { count && <h1>Messages: {count}</h1>}    </div>);
}
Inline If-Else with Conditional Operator
Another method for conditionally rendering elements inline is to use the JavaScript conditional operator [condition ? true : false](<https://developer.mozilla.org/en/docs/Web/JavaScript/Reference/Operators/Conditional_Operator>).
In the example below, we use it to conditionally render a small block of text.
render() {
  const isLoggedIn = this.state.isLoggedIn;
  return (
    <div>      The user is <b>{isLoggedIn ? 'currently' : 'not'}</b> logged in.    </div>);
}
It can also be used for larger expressions although it is less obvious what’s going on:
render() {
  const isLoggedIn = this.state.isLoggedIn;
  return (
    <div>      {isLoggedIn        ? <LogoutButton onClick={this.handleLogoutClick} />        : <LoginButton onClick={this.handleLoginClick} />      }
    </div>  );
}
Just like in JavaScript, it is up to you to choose an appropriate style based on what you and your team consider more readable. Also remember that whenever conditions become too complex, it might be a good time to extract a component.
Preventing Component from Rendering
In rare cases you might want a component to hide itself even though it was rendered by another component. To do this return null instead of its render output.
In the example below, the <WarningBanner /> is rendered depending on the value of the prop called warn. If the value of the prop is false, then the component does not render:
function WarningBanner(props) {
  if (!props.warn) {    return null;  }return (
    <div className="warning">      Warning!
    </div>);
}

class Page extends React.Component {
  constructor(props) {
    super(props);
    this.state = {showWarning: true};
    this.handleToggleClick = this.handleToggleClick.bind(this);
  }

  handleToggleClick() {
    this.setState(state => ({
      showWarning: !state.showWarning
    }));
  }

  render() {
    return (
      <div>        <WarningBanner warn={this.state.showWarning} />        <button onClick={this.handleToggleClick}>          {this.state.showWarning ? 'Hide' : 'Show'}
        </button>      </div>);
  }
}

ReactDOM.render(
  <Page />,
  document.getElementById('root')
);
Returning null from a component’s render method does not affect the firing of the component’s lifecycle methods. For instance componentDidUpdate will still be called.
Lists and Keys
First, let’s review how you transform lists in JavaScript.
Given the code below, we use the [map()](<https://developer.mozilla.org/en-US/docs/Web/JavaScript/Reference/Global_Objects/Array/map>) function to take an array of numbers and double their values. We assign the new array returned by map() to the variable doubled and log it:
const numbers = [1, 2, 3, 4, 5];
const doubled = numbers.map((number) => number * 2);console.log(doubled);
This code logs [2, 4, 6, 8, 10] to the console.
In React, transforming arrays into lists of elements is nearly identical.
Rendering Multiple Components
You can build collections of elements and include them in JSX using curly braces {}.
Below, we loop through the numbers array using the JavaScript [map()](<https://developer.mozilla.org/en-US/docs/Web/JavaScript/Reference/Global_Objects/Array/map>) function. We return a <li> element for each item. Finally, we assign the resulting array of elements to listItems:
const numbers = [1, 2, 3, 4, 5];
const listItems = numbers.map((number) =>  <li>{number}</li>);
We include the entire listItems array inside a <ul> element, and render it to the DOM:
ReactDOM.render(
  <ul>{listItems}</ul>,  document.getElementById('root')
);
https://codepen.io/bgoonz/pen/eYRmvvr?editors=0011
This code displays a bullet list of numbers between 1 and 5.
Basic List Component
Usually you would render lists inside a component.
We can refactor the previous example into a component that accepts an array of numbers and outputs a list of elements.
function NumberList(props) {
  const numbers = props.numbers;
  const listItems = numbers.map((number) =>    <li>{number}</li>  );  return (
    <ul>{listItems}</ul>  );
}

const numbers = [1, 2, 3, 4, 5];
ReactDOM.render(
  <NumberList numbers={numbers} />,  document.getElementById('root')
);
When you run this code, you’ll be given a warning that a key should be provided for list items. A “key” is a special string attribute you need to include when creating lists of elements. We’ll discuss why it’s important in the next section.
Let’s assign a key to our list items inside numbers.map() and fix the missing key issue.
function NumberList(props) {
  const numbers = props.numbers;
  const listItems = numbers.map((number) =>
    <li key={number.toString()}>      {number}
    </li>);
  return (
    <ul>{listItems}</ul>);
}

const numbers = [1, 2, 3, 4, 5];
ReactDOM.render(
  <NumberList numbers={numbers} />,
  document.getElementById('root')
);
https://codepen.io/bgoonz/pen/yLXyMMP?editors=0011
Keys
Keys help React identify which items have changed, are added, or are removed. Keys should be given to the elements inside the array to give the elements a stable identity:
const numbers = [1, 2, 3, 4, 5];
const listItems = numbers.map((number) =>
  <li key={number.toString()}>    {number}
  </li>);
The best way to pick a key is to use a string that uniquely identifies a list item among its siblings. Most often you would use IDs from your data as keys:
const todoItems = todos.map((todo) =>
  <li key={todo.id}>    {todo.text}
  </li>);
When you don’t have stable IDs for rendered items, you may use the item index as a key as a last resort:
const todoItems = todos.map((todo, index) =>
  // Only do this if items have no stable IDs  <li key={index}>    {todo.text}
  </li>);
We don’t recommend using indexes for keys if the order of items may change. This can negatively impact performance and may cause issues with component state. Check out Robin Pokorny’s article for an in-depth explanation on the negative impacts of using an index as a key. If you choose not to assign an explicit key to list items then React will default to using indexes as keys.
Here is an in-depth explanation about why keys are necessary if you’re interested in learning more.
Extracting Components with Keys
Keys only make sense in the context of the surrounding array.
For example, if you extract a ListItem component, you should keep the key on the <ListItem /> elements in the array rather than on the <li> element in the ListItem itself.
Example: Incorrect Key Usage
function ListItem(props) {
  const value = props.value;
  return (
    // Wrong! There is no need to specify the key here:    <li key={value.toString()}>      {value}
    </li>);
}

function NumberList(props) {
  const numbers = props.numbers;
  const listItems = numbers.map((number) =>
    // Wrong! The key should have been specified here:    <ListItem value={number} />  );
  return (
    <ul>      {listItems}
    </ul>);
}

const numbers = [1, 2, 3, 4, 5];
ReactDOM.render(
  <NumberList numbers={numbers} />,
  document.getElementById('root')
);
Example: Correct Key Usage
function ListItem(props) {
  // Correct! There is no need to specify the key here:  return <li>{props.value}</li>;}

function NumberList(props) {
  const numbers = props.numbers;
  const listItems = numbers.map((number) =>
    // Correct! Key should be specified inside the array.    <ListItem key={number.toString()} value={number} />  );
  return (
    <ul>      {listItems}
    </ul>);
}

const numbers = [1, 2, 3, 4, 5];
ReactDOM.render(
  <NumberList numbers={numbers} />,
  document.getElementById('root')
);
A good rule of thumb is that elements inside the map() call need keys.
Keys Must Only Be Unique Among Siblings
Keys used within arrays should be unique among their siblings. However, they don’t need to be globally unique. We can use the same keys when we produce two different arrays:
function Blog(props) {
  const sidebar = (    <ul>      {props.posts.map((post) =>
        <li key={post.id}>          {post.title}
        </li>)}
    </ul>);
  const content = props.posts.map((post) =>    <div key={post.id}>      <h3>{post.title}</h3>      <p>{post.content}</p>    </div>);
  return (
    <div>      {sidebar}      <hr />      {content}    </div>);
}

const posts = [
  {id: 1, title: 'Hello World', content: 'Welcome to learning React!'},
  {id: 2, title: 'Installation', content: 'You can install React from npm.'}
];
ReactDOM.render(
  <Blog posts={posts} />,
  document.getElementById('root')
);
https://codepen.io/bgoonz/pen/mdwyWWy?editors=0010
Keys serve as a hint to React but they don’t get passed to your components. If you need the same value in your component, pass it explicitly as a prop with a different name:
const content = posts.map((post) =>
  <Post    key={post.id}    id={post.id}    title={post.title} />);
With the example above, the Post component can read props.id, but not props.key.
Embedding map() in JSX
In the examples above we declared a separate listItems variable and included it in JSX:
function NumberList(props) {
  const numbers = props.numbers;
  const listItems = numbers.map((number) =>    <ListItem key={number.toString()}              value={number} />  );  return (
    <ul>      {listItems}
    </ul>);
}
JSX allows embedding any expression in curly braces so we could inline the map() result:
function NumberList(props) {
  const numbers = props.numbers;
  return (
    <ul>      {numbers.map((number) =>        <ListItem key={number.toString()}                  value={number} />      )}    </ul>);
}
https://codepen.io/bgoonz/pen/JjJoWEw?editors=0010
Sometimes this results in clearer code, but this style can also be abused. Like in JavaScript, it is up to you to decide whether it is worth extracting a variable for readability. Keep in mind that if the map() body is too nested, it might be a good time to extract a component.
Forms
HTML form elements work a bit differently from other DOM elements in React, because form elements naturally keep some internal state. For example, this form in plain HTML accepts a single name:
<form><label>
    Name:
    <input type="text" name="name" /></label><input type="submit" value="Submit" /></form>
This form has the default HTML form behavior of browsing to a new page when the user submits the form. If you want this behavior in React, it just works. But in most cases, it’s convenient to have a JavaScript function that handles the submission of the form and has access to the data that the user entered into the form. The standard way to achieve this is with a technique called “controlled components”.
Controlled Components
In HTML, form elements such as <input>, <textarea>, and <select> typically maintain their own state and update it based on user input. In React, mutable state is typically kept in the state property of components, and only updated with [setState()](<https://reactjs.org/docs/react-component.html#setstate>).
We can combine the two by making the React state be the “single source of truth”. Then the React component that renders a form also controls what happens in that form on subsequent user input. An input form element whose value is controlled by React in this way is called a “controlled component”.
For example, if we want to make the previous example log the name when it is submitted, we can write the form as a controlled component:
class NameForm extends React.Component {
  constructor(props) {
    super(props);
    this.state = {value: ''};this.handleChange = this.handleChange.bind(this);
    this.handleSubmit = this.handleSubmit.bind(this);
  }

  handleChange(event) {    this.setState({value: event.target.value});  }handleSubmit(event) {
    alert('A name was submitted: ' + this.state.value);
    event.preventDefault();
  }

  render() {
    return (
      <form onSubmit={this.handleSubmit}>        <label>          Name:
          <input type="text" value={this.state.value} onChange={this.handleChange} />        </label>        <input type="submit" value="Submit" />      </form>);
  }
}
https://codepen.io/bgoonz/pen/rNwayjv?editors=0010
Since the value attribute is set on our form element, the displayed value will always be this.state.value, making the React state the source of truth. Since handleChange runs on every keystroke to update the React state, the displayed value will update as the user types.
With a controlled component, the input’s value is always driven by the React state. While this means you have to type a bit more code, you can now pass the value to other UI elements too, or reset it from other event handlers.
The textarea Tag
In HTML, a <textarea> element defines its text by its children:
<textarea>
  Hello there, this is some text in a text area
</textarea>
In React, a <textarea> uses a value attribute instead. This way, a form using a <textarea> can be written very similarly to a form that uses a single-line input:
class EssayForm extends React.Component {
  constructor(props) {
    super(props);
    this.state = {      value: 'Please write an essay about your favorite DOM element.'    };this.handleChange = this.handleChange.bind(this);
    this.handleSubmit = this.handleSubmit.bind(this);
  }

  handleChange(event) {    this.setState({value: event.target.value});  }handleSubmit(event) {
    alert('An essay was submitted: ' + this.state.value);
    event.preventDefault();
  }

  render() {
    return (
      <form onSubmit={this.handleSubmit}>        <label>          Essay:
          <textarea value={this.state.value} onChange={this.handleChange} />        </label>        <input type="submit" value="Submit" />      </form>);
  }
}
Notice that this.state.value is initialized in the constructor, so that the text area starts off with some text in it.
The select Tag
In HTML, <select> creates a drop-down list. For example, this HTML creates a drop-down list of flavors:
<select><option value="grapefruit">Grapefruit</option><option value="lime">Lime</option><option selected value="coconut">Coconut</option><option value="mango">Mango</option></select>
Note that the Coconut option is initially selected, because of the selected attribute. React, instead of using this selected attribute, uses a value attribute on the root select tag. This is more convenient in a controlled component because you only need to update it in one place. For example:
class FlavorForm extends React.Component {
  constructor(props) {
    super(props);
    this.state = {value: 'coconut'};this.handleChange = this.handleChange.bind(this);
    this.handleSubmit = this.handleSubmit.bind(this);
  }

  handleChange(event) {    this.setState({value: event.target.value});  }handleSubmit(event) {
    alert('Your favorite flavor is: ' + this.state.value);
    event.preventDefault();
  }

  render() {
    return (
      <form onSubmit={this.handleSubmit}>        <label>          Pick your favorite flavor:
          <select value={this.state.value} onChange={this.handleChange}>            <option value="grapefruit">Grapefruit</option>            <option value="lime">Lime</option>            <option value="coconut">Coconut</option>            <option value="mango">Mango</option>          </select>        </label>        <input type="submit" value="Submit" />      </form>);
  }
}
Overall, this makes it so that <input type="text">, <textarea>, and <select> all work very similarly - they all accept a value attribute that you can use to implement a controlled component.
NoteYou can pass an array into the value attribute, allowing you to select multiple options in a select tag:<select multiple={true} value={[‘B’, ‘C’]}>
The file input Tag
In HTML, an <input type="file"> lets the user choose one or more files from their device storage to be uploaded to a server or manipulated by JavaScript via the File API.
<input type="file" />
Because its value is read-only, it is an uncontrolled component in React. It is discussed together with other uncontrolled components later in the documentation.
Handling Multiple Inputs
When you need to handle multiple controlled input elements, you can add a name attribute to each element and let the handler function choose what to do based on the value of event.target.name.
For example:
class Reservation extends React.Component {
  constructor(props) {
    super(props);
    this.state = {
      isGoing: true,
      numberOfGuests: 2
    };

    this.handleInputChange = this.handleInputChange.bind(this);
  }

  handleInputChange(event) {
    const target = event.target;
    const value = target.type === 'checkbox' ? target.checked : target.value;
    const name = target.name;this.setState({
      [name]: value    });
  }

  render() {
    return (
      <form>        <label>          Is going:
          <input
            name="isGoing"            type="checkbox"checked={this.state.isGoing}onChange={this.handleInputChange} />        </label>        <br />        <label>          Number of guests:
          <input
            name="numberOfGuests"            type="number"value={this.state.numberOfGuests}onChange={this.handleInputChange} />        </label>      </form>);
  }
}
Note how we used the ES6 computed property name syntax to update the state key corresponding to the given input name:
this.setState({
  [name]: value});
It is equivalent to this ES5 code:
var partialState = {};
partialState[name] = value;this.setState(partialState);
Also, since setState() automatically merges a partial state into the current state, we only needed to call it with the changed parts.
Controlled Input Null Value
Specifying the value prop on a controlled component prevents the user from changing the input unless you desire so. If you’ve specified a value but the input is still editable, you may have accidentally set value to undefined or null.
The following code demonstrates this. (The input is locked at first but becomes editable after a short delay.)
ReactDOM.render(<input value="hi" />, mountNode);

setTimeout(function() {
  ReactDOM.render(<input value={null} />, mountNode);
}, 1000);
Alternatives to Controlled Components
It can sometimes be tedious to use controlled components, because you need to write an event handler for every way your data can change and pipe all of the input state through a React component. This can become particularly annoying when you are converting a preexisting codebase to React, or integrating a React application with a non-React library. In these situations, you might want to check out uncontrolled components, an alternative technique for implementing input forms.
Fully-Fledged Solutions
If you’re looking for a complete solution including validation, keeping track of the visited fields, and handling form submission, Formik is one of the popular choices. However, it is built on the same principles of controlled components and managing state — so don’t neglect to learn them.
Lifting State Up
Often, several components need to reflect the same changing data. We recommend lifting the shared state up to their closest common ancestor. Let’s see how this works in action.
In this section, we will create a temperature calculator that calculates whether the water would boil at a given temperature.
We will start with a component called BoilingVerdict. It accepts the celsius temperature as a prop, and prints whether it is enough to boil the water:
function BoilingVerdict(props) {
  if (props.celsius >= 100) {
    return <p>The water would boil.</p>;  }
  return <p>The water would not boil.</p>;}
Next, we will create a component called Calculator. It renders an <input> that lets you enter the temperature, and keeps its value in this.state.temperature.
Additionally, it renders the BoilingVerdict for the current input value.
class Calculator extends React.Component {
  constructor(props) {
    super(props);
    this.handleChange = this.handleChange.bind(this);
    this.state = {temperature: ''};  }

  handleChange(e) {
    this.setState({temperature: e.target.value});  }

  render() {
    const temperature = this.state.temperature;    return (
      <fieldset>        <legend>Enter temperature in Celsius:</legend>        <input          value={temperature}          onChange={this.handleChange} />        <BoilingVerdict          celsius={parseFloat(temperature)} />      </fieldset>);
  }
}
https://codepen.io/bgoonz/pen/zYzxZoL?editors=0010
Adding a Second Input
Our new requirement is that, in addition to a Celsius input, we provide a Fahrenheit input, and they are kept in sync.
We can start by extracting a TemperatureInput component from Calculator. We will add a new scale prop to it that can either be "c" or "f":
const scaleNames = {  c: 'Celsius',  f: 'Fahrenheit'};class TemperatureInput extends React.Component {
  constructor(props) {
    super(props);
    this.handleChange = this.handleChange.bind(this);
    this.state = {temperature: ''};
  }

  handleChange(e) {
    this.setState({temperature: e.target.value});
  }

  render() {
    const temperature = this.state.temperature;
    const scale = this.props.scale;    return (
      <fieldset>        <legend>Enter temperature in {scaleNames[scale]}:</legend>        <input value={temperature}onChange={this.handleChange} />      </fieldset>);
  }
}
We can now change the Calculator to render two separate temperature inputs:
class Calculator extends React.Component {
  render() {
    return (
      <div>        <TemperatureInput scale="c" />        <TemperatureInput scale="f" />      </div>);
  }
}
https://codepen.io/bgoonz/pen/QWgwpGv?editors=0010
We have two inputs now, but when you enter the temperature in one of them, the other doesn’t update. This contradicts our requirement: we want to keep them in sync.
We also can’t display the BoilingVerdict from Calculator. The Calculator doesn’t know the current temperature because it is hidden inside the TemperatureInput.
Writing Conversion Functions
First, we will write two functions to convert from Celsius to Fahrenheit and back:
function toCelsius(fahrenheit) {
  return (fahrenheit - 32) * 5 / 9;
}

function toFahrenheit(celsius) {
  return (celsius * 9 / 5) + 32;
}
These two functions convert numbers. We will write another function that takes a string temperature and a converter function as arguments and returns a string. We will use it to calculate the value of one input based on the other input.
It returns an empty string on an invalid temperature, and it keeps the output rounded to the third decimal place:
function tryConvert(temperature, convert) {
  const input = parseFloat(temperature);
  if (Number.isNaN(input)) {
    return '';
  }
  const output = convert(input);
  const rounded = Math.round(output * 1000) / 1000;
  return rounded.toString();
}
For example, tryConvert('abc', toCelsius) returns an empty string, and tryConvert('10.22', toFahrenheit) returns '50.396'.
Lifting State Up
Currently, both TemperatureInput components independently keep their values in the local state:
class TemperatureInput extends React.Component {
  constructor(props) {
    super(props);
    this.handleChange = this.handleChange.bind(this);
    this.state = {temperature: ''};  }

  handleChange(e) {
    this.setState({temperature: e.target.value});  }

  render() {
    const temperature = this.state.temperature;    // ...
However, we want these two inputs to be in sync with each other. When we update the Celsius input, the Fahrenheit input should reflect the converted temperature, and vice versa.
In React, sharing state is accomplished by moving it up to the closest common ancestor of the components that need it. This is called “lifting state up”. We will remove the local state from the TemperatureInput and move it into the Calculator instead.
If the Calculator owns the shared state, it becomes the “source of truth” for the current temperature in both inputs. It can instruct them both to have values that are consistent with each other. Since the props of both TemperatureInput components are coming from the same parent Calculator component, the two inputs will always be in sync.
Let’s see how this works step by step.
First, we will replace this.state.temperature with this.props.temperature in the TemperatureInput component. For now, let’s pretend this.props.temperature already exists, although we will need to pass it from the Calculator in the future:
  render() {
    // Before: const temperature = this.state.temperature;
    const temperature = this.props.temperature;    // ...
We know that props are read-only. When the temperature was in the local state, the TemperatureInput could just call this.setState() to change it. However, now that the temperature is coming from the parent as a prop, the TemperatureInput has no control over it.
In React, this is usually solved by making a component “controlled”. Just like the DOM <input> accepts both a value and an onChange prop, so can the custom TemperatureInput accept both temperature and onTemperatureChange props from its parent Calculator.
Now, when the TemperatureInput wants to update its temperature, it calls this.props.onTemperatureChange:
  handleChange(e) {
    // Before: this.setState({temperature: e.target.value});
    this.props.onTemperatureChange(e.target.value);    // ...
Note:There is no special meaning to either temperature or onTemperatureChange prop names in custom components. We could have called them anything else, like name them value and onChange which is a common convention.
The onTemperatureChange prop will be provided together with the temperature prop by the parent Calculator component. It will handle the change by modifying its own local state, thus re-rendering both inputs with the new values. We will look at the new Calculator implementation very soon.
Before diving into the changes in the Calculator, let’s recap our changes to the TemperatureInput component. We have removed the local state from it, and instead of reading this.state.temperature, we now read this.props.temperature. Instead of calling this.setState() when we want to make a change, we now call this.props.onTemperatureChange(), which will be provided by the Calculator:
class TemperatureInput extends React.Component {
  constructor(props) {
    super(props);
    this.handleChange = this.handleChange.bind(this);
  }

  handleChange(e) {
    this.props.onTemperatureChange(e.target.value);  }

  render() {
    const temperature = this.props.temperature;    const scale = this.props.scale;
    return (
      <fieldset>        <legend>Enter temperature in {scaleNames[scale]}:</legend>        <input value={temperature}onChange={this.handleChange} />      </fieldset>);
  }
}
Now let’s turn to the Calculator component.
We will store the current input’s temperature and scale in its local state. This is the state we “lifted up” from the inputs, and it will serve as the “source of truth” for both of them. It is the minimal representation of all the data we need to know in order to render both inputs.
For example, if we enter 37 into the Celsius input, the state of the Calculator component will be:
{
  temperature: '37',
  scale: 'c'
}
If we later edit the Fahrenheit field to be 212, the state of the Calculator will be:
{
  temperature: '212',
  scale: 'f'
}
We could have stored the value of both inputs but it turns out to be unnecessary. It is enough to store the value of the most recently changed input, and the scale that it represents. We can then infer the value of the other input based on the current temperature and scale alone.
The inputs stay in sync because their values are computed from the same state:
class Calculator extends React.Component {
  constructor(props) {
    super(props);
    this.handleCelsiusChange = this.handleCelsiusChange.bind(this);
    this.handleFahrenheitChange = this.handleFahrenheitChange.bind(this);
    this.state = {temperature: '', scale: 'c'};  }

  handleCelsiusChange(temperature) {
    this.setState({scale: 'c', temperature});  }

  handleFahrenheitChange(temperature) {
    this.setState({scale: 'f', temperature});  }

  render() {
    const scale = this.state.scale;    const temperature = this.state.temperature;    const celsius = scale === 'f' ? tryConvert(temperature, toCelsius) : temperature;    const fahrenheit = scale === 'c' ? tryConvert(temperature, toFahrenheit) : temperature;return (
      <div>        <TemperatureInputscale="c"          temperature={celsius}          onTemperatureChange={this.handleCelsiusChange} />        <TemperatureInputscale="f"          temperature={fahrenheit}          onTemperatureChange={this.handleFahrenheitChange} />        <BoilingVerdict          celsius={parseFloat(celsius)} />      </div>);
  }
}
Now, no matter which input you edit, this.state.temperature and this.state.scale in the Calculator get updated. One of the inputs gets the value as is, so any user input is preserved, and the other input value is always recalculated based on it.
Let’s recap what happens when you edit an input:
- React calls the function specified as
onChangeon the DOM<input>. In our case, this is thehandleChangemethod in theTemperatureInputcomponent. - The
handleChangemethod in theTemperatureInputcomponent callsthis.props.onTemperatureChange()with the new desired value. Its props, includingonTemperatureChange, were provided by its parent component, theCalculator. - When it previously rendered, the
Calculatorhad specified thatonTemperatureChangeof the CelsiusTemperatureInputis theCalculator’shandleCelsiusChangemethod, andonTemperatureChangeof the FahrenheitTemperatureInputis theCalculator’shandleFahrenheitChangemethod. So either of these twoCalculatormethods gets called depending on which input we edited. - Inside these methods, the
Calculatorcomponent asks React to re-render itself by callingthis.setState()with the new input value and the current scale of the input we just edited. - React calls the
Calculatorcomponent’srendermethod to learn what the UI should look like. The values of both inputs are recomputed based on the current temperature and the active scale. The temperature conversion is performed here. - React calls the
rendermethods of the individualTemperatureInputcomponents with their new props specified by theCalculator. It learns what their UI should look like. - React calls the
rendermethod of theBoilingVerdictcomponent, passing the temperature in Celsius as its props. - React DOM updates the DOM with the boiling verdict and to match the desired input values. The input we just edited receives its current value, and the other input is updated to the temperature after conversion.
Every update goes through the same steps so the inputs stay in sync.
Lessons Learned
There should be a single “source of truth” for any data that changes in a React application. Usually, the state is first added to the component that needs it for rendering. Then, if other components also need it, you can lift it up to their closest common ancestor. Instead of trying to sync the state between different components, you should rely on the top-down data flow.
Lifting state involves writing more “boilerplate” code than two-way binding approaches, but as a benefit, it takes less work to find and isolate bugs. Since any state “lives” in some component and that component alone can change it, the surface area for bugs is greatly reduced. Additionally, you can implement any custom logic to reject or transform user input.
If something can be derived from either props or state, it probably shouldn’t be in the state. For example, instead of storing both celsiusValue and fahrenheitValue, we store just the last edited temperature and its scale. The value of the other input can always be calculated from them in the render() method. This lets us clear or apply rounding to the other field without losing any precision in the user input.
When you see something wrong in the UI, you can use React Developer Tools to inspect the props and move up the tree until you find the component responsible for updating the state. This lets you trace the bugs to their source:
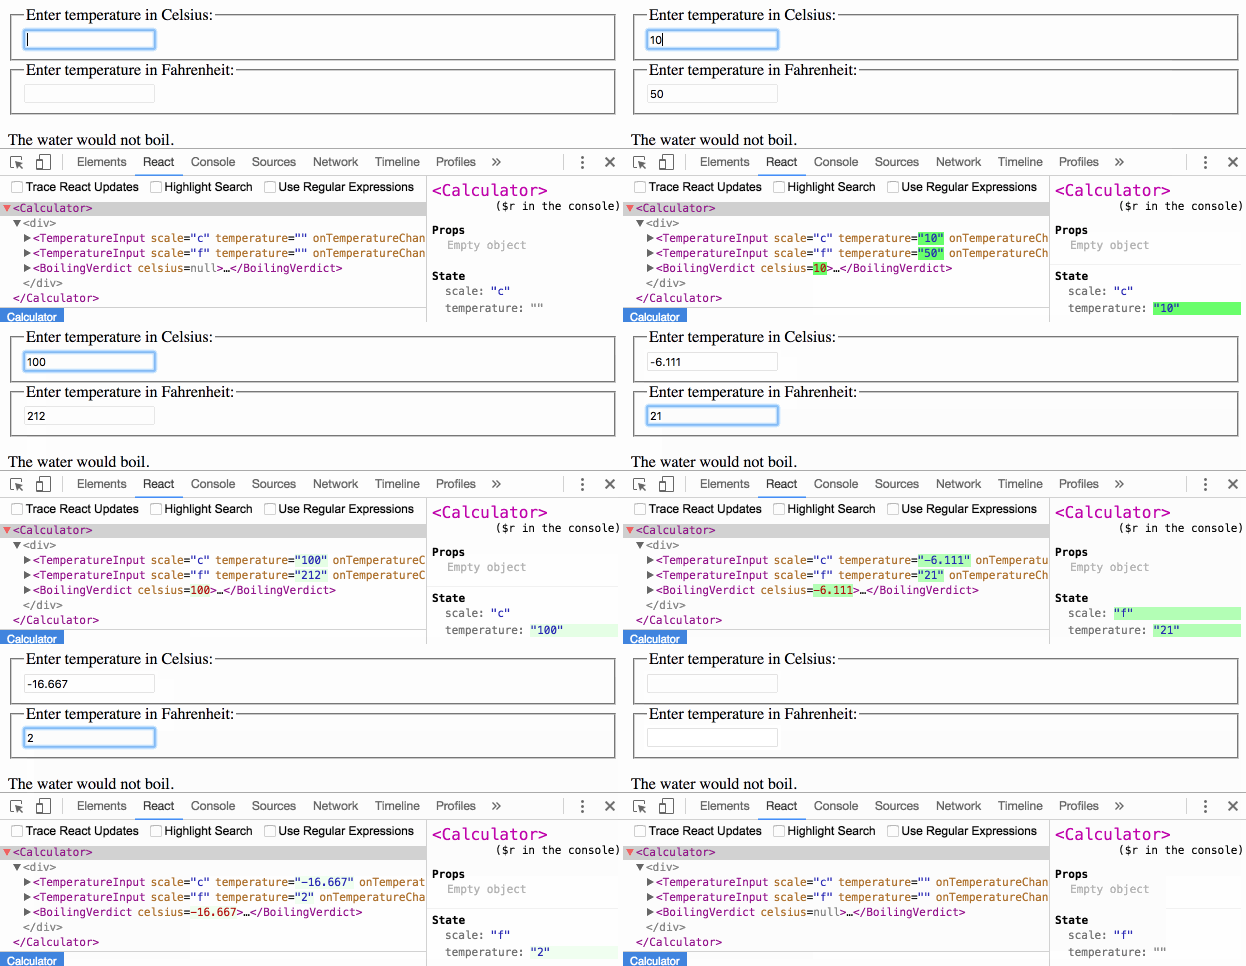
Composition vs Inheritance
React has a powerful composition model, and we recommend using composition instead of inheritance to reuse code between components.
In this section, we will consider a few problems where developers new to React often reach for inheritance, and show how we can solve them with composition.
Containment
Some components don’t know their children ahead of time. This is especially common for components like Sidebar or Dialog that represent generic “boxes”.
We recommend that such components use the special children prop to pass children elements directly into their output:
function FancyBorder(props) {
  return (
    <div className={'FancyBorder FancyBorder-' + props.color}>      {props.children}    </div>);
}
This lets other components pass arbitrary children to them by nesting the JSX:
function WelcomeDialog() {
  return (
    <FancyBorder color="blue">      <h1 className="Dialog-title">        Welcome      </h1>      <p className="Dialog-message">        Thank you for visiting our spacecraft!      </p>    </FancyBorder>);
}
Anything inside the <FancyBorder> JSX tag gets passed into the FancyBorder component as a children prop. Since FancyBorder renders {props.children} inside a <div>, the passed elements appear in the final output.
While this is less common, sometimes you might need multiple “holes” in a component. In such cases you may come up with your own convention instead of using children:
function SplitPane(props) {
  return (
    <div className="SplitPane">      <div className="SplitPane-left">        {props.left}      </div>      <div className="SplitPane-right">        {props.right}      </div>    </div>);
}

function App() {
  return (
    <SplitPaneleft={
        <Contacts />      }right={
        <Chat />      } />);
}
React elements like <Contacts /> and <Chat /> are just objects, so you can pass them as props like any other data. This approach may remind you of “slots” in other libraries but there are no limitations on what you can pass as props in React.
Specialization
Sometimes we think about components as being “special cases” of other components. For example, we might say that a WelcomeDialog is a special case of Dialog.
In React, this is also achieved by composition, where a more “specific” component renders a more “generic” one and configures it with props:
function Dialog(props) {
  return (
    <FancyBorder color="blue">      <h1 className="Dialog-title">        {props.title}      </h1>      <p className="Dialog-message">        {props.message}      </p>    </FancyBorder>);
}

function WelcomeDialog() {
  return (
    <Dialog      title="Welcome"      message="Thank you for visiting our spacecraft!" />  );
}
Composition works equally well for components defined as classes:
function Dialog(props) {
  return (
    <FancyBorder color="blue">      <h1 className="Dialog-title">        {props.title}
      </h1>      <p className="Dialog-message">        {props.message}
      </p>      {props.children}    </FancyBorder>);
}

class SignUpDialog extends React.Component {
  constructor(props) {
    super(props);
    this.handleChange = this.handleChange.bind(this);
    this.handleSignUp = this.handleSignUp.bind(this);
    this.state = {login: ''};
  }

  render() {
    return (
      <Dialog title="Mars Exploration Program"message="How should we refer to you?">        <input value={this.state.login}               onChange={this.handleChange} />        <button onClick={this.handleSignUp}>          Sign Me Up!        </button>      </Dialog>);
  }

  handleChange(e) {
    this.setState({login: e.target.value});
  }

  handleSignUp() {
    alert(`Welcome aboard, ${this.state.login}!`);
  }
}
So What About Inheritance?
At Facebook, we use React in thousands of components, and we haven’t found any use cases where we would recommend creating component inheritance hierarchies.
Props and composition give you all the flexibility you need to customize a component’s look and behavior in an explicit and safe way. Remember that components may accept arbitrary props, including primitive values, React elements, or functions.
If you want to reuse non-UI functionality between components, we suggest extracting it into a separate JavaScript module. The components may import it and use that function, object, or a class, without extending it.
Thinking in React
React is, in our opinion, the premier way to build big, fast Web apps with JavaScript. It has scaled very well for us at Facebook and Instagram.
One of the many great parts of React is how it makes you think about apps as you build them. In this document, we’ll walk you through the thought process of building a searchable product data table using React.
Start With A Mock
Imagine that we already have a JSON API and a mock from our designer. The mock looks like this:
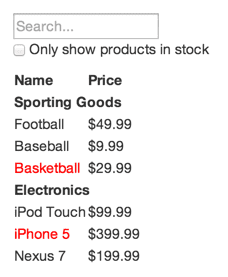
Our JSON API returns some data that looks like this:
[
  {category: "Sporting Goods", price: "$49.99", stocked: true, name: "Football"},
  {category: "Sporting Goods", price: "$9.99", stocked: true, name: "Baseball"},
  {category: "Sporting Goods", price: "$29.99", stocked: false, name: "Basketball"},
  {category: "Electronics", price: "$99.99", stocked: true, name: "iPod Touch"},
  {category: "Electronics", price: "$399.99", stocked: false, name: "iPhone 5"},
  {category: "Electronics", price: "$199.99", stocked: true, name: "Nexus 7"}
];
Step 1: Break The UI Into A Component Hierarchy
The first thing you’ll want to do is to draw boxes around every component (and subcomponent) in the mock and give them all names. If you’re working with a designer, they may have already done this, so go talk to them! Their Photoshop layer names may end up being the names of your React components!
But how do you know what should be its own component? Use the same techniques for deciding if you should create a new function or object. One such technique is the single responsibility principle, that is, a component should ideally only do one thing. If it ends up growing, it should be decomposed into smaller subcomponents.
Since you’re often displaying a JSON data model to a user, you’ll find that if your model was built correctly, your UI (and therefore your component structure) will map nicely. That’s because UI and data models tend to adhere to the same information architecture. Separate your UI into components, where each component matches one piece of your data model.

You’ll see here that we have five components in our app. We’ve italicized the data each component represents.
FilterableProductTable(orange): contains the entirety of the exampleSearchBar(blue): receives all user inputProductTable(green): displays and filters the data collection based on user inputProductCategoryRow(turquoise): displays a heading for each categoryProductRow(red): displays a row for each product
If you look at ProductTable, you’ll see that the table header (containing the “Name” and “Price” labels) isn’t its own component. This is a matter of preference, and there’s an argument to be made either way. For this example, we left it as part of ProductTable because it is part of rendering the data collection which is ProductTable’s responsibility. However, if this header grows to be complex (e.g., if we were to add affordances for sorting), it would certainly make sense to make this its own ProductTableHeader component.
Now that we’ve identified the components in our mock, let’s arrange them into a hierarchy. Components that appear within another component in the mock should appear as a child in the hierarchy:
FilterableProductTableSearchBarProductTableProductCategoryRowProductRow
Step 2: Build A Static Version in React
See the Pen Thinking In React: Step 2 on CodePen.
Now that you have your component hierarchy, it’s time to implement your app. The easiest way is to build a version that takes your data model and renders the UI but has no interactivity. It’s best to decouple these processes because building a static version requires a lot of typing and no thinking, and adding interactivity requires a lot of thinking and not a lot of typing. We’ll see why.
To build a static version of your app that renders your data model, you’ll want to build components that reuse other components and pass data using props. props are a way of passing data from parent to child. If you’re familiar with the concept of state, don’t use state at all to build this static version. State is reserved only for interactivity, that is, data that changes over time. Since this is a static version of the app, you don’t need it.
You can build top-down or bottom-up. That is, you can either start with building the components higher up in the hierarchy (i.e. starting with FilterableProductTable) or with the ones lower in it (ProductRow). In simpler examples, it’s usually easier to go top-down, and on larger projects, it’s easier to go bottom-up and write tests as you build.
At the end of this step, you’ll have a library of reusable components that render your data model. The components will only have render() methods since this is a static version of your app. The component at the top of the hierarchy (FilterableProductTable) will take your data model as a prop. If you make a change to your underlying data model and call ReactDOM.render() again, the UI will be updated. You can see how your UI is updated and where to make changes. React’s one-way data flow (also called one-way binding) keeps everything modular and fast.
Refer to the React docs if you need help executing this step.
A Brief Interlude: Props vs State
There are two types of “model” data in React: props and state. It’s important to understand the distinction between the two; skim the official React docs if you aren’t sure what the difference is. See also FAQ: What is the difference between state and props?
Step 3: Identify The Minimal (but complete) Representation Of UI State
To make your UI interactive, you need to be able to trigger changes to your underlying data model. React achieves this with state.
To build your app correctly, you first need to think of the minimal set of mutable state that your app needs. The key here is DRY: Don’t Repeat Yourself. Figure out the absolute minimal representation of the state your application needs and compute everything else you need on-demand. For example, if you’re building a TODO list, keep an array of the TODO items around; don’t keep a separate state variable for the count. Instead, when you want to render the TODO count, take the length of the TODO items array.
Think of all the pieces of data in our example application. We have:
- The original list of products
- The search text the user has entered
- The value of the checkbox
- The filtered list of products
Let’s go through each one and figure out which one is state. Ask three questions about each piece of data:
- Is it passed in from a parent via props? If so, it probably isn’t state.
- Does it remain unchanged over time? If so, it probably isn’t state.
- Can you compute it based on any other state or props in your component? If so, it isn’t state.
The original list of products is passed in as props, so that’s not state. The search text and the checkbox seem to be state since they change over time and can’t be computed from anything. And finally, the filtered list of products isn’t state because it can be computed by combining the original list of products with the search text and value of the checkbox.
So finally, our state is:
- The search text the user has entered
- The value of the checkbox
Step 4: Identify Where Your State Should Live
See the Pen Thinking In React: Step 4 on CodePen.
OK, so we’ve identified what the minimal set of app state is. Next, we need to identify which component mutates, or owns, this state.
Remember: React is all about one-way data flow down the component hierarchy. It may not be immediately clear which component should own what state. This is often the most challenging part for newcomers to understand, so follow these steps to figure it out:
For each piece of state in your application:
- Identify every component that renders something based on that state.
- Find a common owner component (a single component above all the components that need the state in the hierarchy).
- Either the common owner or another component higher up in the hierarchy should own the state.
- If you can’t find a component where it makes sense to own the state, create a new component solely for holding the state and add it somewhere in the hierarchy above the common owner component.
Let’s run through this strategy for our application:
ProductTableneeds to filter the product list based on state andSearchBarneeds to display the search text and checked state.- The common owner component is
FilterableProductTable. - It conceptually makes sense for the filter text and checked value to live in
FilterableProductTable
Cool, so we’ve decided that our state lives in FilterableProductTable. First, add an instance property this.state = {filterText: '', inStockOnly: false} to FilterableProductTable’s constructor to reflect the initial state of your application. Then, pass filterText and inStockOnly to ProductTable and SearchBar as a prop. Finally, use these props to filter the rows in ProductTable and set the values of the form fields in SearchBar.
You can start seeing how your application will behave: set filterText to "ball" and refresh your app. You’ll see that the data table is updated correctly.
Step 5: Add Inverse Data Flow
See the Pen Thinking In React: Step 5 on CodePen.
So far, we’ve built an app that renders correctly as a function of props and state flowing down the hierarchy. Now it’s time to support data flowing the other way: the form components deep in the hierarchy need to update the state in FilterableProductTable.
React makes this data flow explicit to help you understand how your program works, but it does require a little more typing than traditional two-way data binding.
If you try to type or check the box in the current version of the example, you’ll see that React ignores your input. This is intentional, as we’ve set the value prop of the input to always be equal to the state passed in from FilterableProductTable.
Let’s think about what we want to happen. We want to make sure that whenever the user changes the form, we update the state to reflect the user input. Since components should only update their own state, FilterableProductTable will pass callbacks to SearchBar that will fire whenever the state should be updated. We can use the onChange event on the inputs to be notified of it. The callbacks passed by FilterableProductTable will call setState(), and the app will be updated.
And That’s It
Hopefully, this gives you an idea of how to think about building components and applications with React. While it may be a little more typing than you’re used to, remember that code is read far more than it’s written, and it’s less difficult to read this modular, explicit code. As you start to build large libraries of components, you’ll appreciate this explicitness and modularity, and with code reuse, your lines of code will start to shrink. :)
A visual guide to React Mental models
When I started building websites in 2014 I had a hard time understanding how it all worked. Building my blog with WordPress was easy, but I had no idea about hosting, servers, DNS, certificates, and much more.
As I read articles and tried stuff out (and broke my server config more than once) I started to grasp the system, to get glimpses into how it all worked, until eventually it “clicked” and I felt comfortable working with it. My mind had built a mental model around this system that I could use to work with it.
If someone had explained it by transferred their mental model to me, I would’ve understood it much faster. Here I’ll explain (and show) the mental models I use with React. It will help you understand React better and make you a better developer.
React Mental Models
React helps us build complex, interactive UIs more easily than ever before. It also encourages us to write code in a certain way, guiding us to create apps that are simpler to navigate and understand.

React itself is a mental model with a simple idea at its core: encapsulate portions of your app that rely on similar logic and UI and React will make sure that portion is always up kept up to date.
Whether you’ve been working with React for years or are just starting, having a clear mental model is the best way to feel confident working with it. So for me to transfer my mental models to you I’ll start from first-principles and build on top of them.
It’s functions all the way down
Let’s start by modeling the basic building blocks of JavaScript and React: functions.
- A React component is just a function
- Components containing other components are functions calling other functions
- Props are the function’s arguments
This is hidden away by JSX, the markup language React uses. Strip away JSX and React is a bunch of functions calling one another. JSX is in itself an applied mental model that makes using React simpler and more intuitive.
Let’s look at each part individually.
A component is a function that returns JSX
React is used with JSX—JavaScript XML—a way to write what seems as HTML with all of JavaScript’s power. JSX offers a great applied mental model for using nested functions in a way that feels intuitive.
Let’s ignore class components and focus on the far more common functional components. A functional component is a function that behaves exactly like any other JavaScript function. React components always return JSX which is then executed and turned into HTML.
This is what simple JSX looks like:
const Li = (props) => <li {...props}>{props.children}</li>;

export const RickRoll = () => (
  <div>
    <div className="wrapper">
      <ul>
        <Li color={"red"}>Never give you up</Li>
      </ul>
    </div>
  </div>
);
Which compiled into pure JavaScript by Babel:
const Li = (props) => React.createElement("li", props, props.children);

export const RickRoll = () =>
  React.createElement(
    "div",
    null,
    React.createElement(
      "div",
      {
        className: "wrapper",
      },
      React.createElement(
        "ul",
        null,
        React.createElement(
          Li,
          {
            color: "red",
          },
          "Never give you up"
        )
      )
    )
  );
Now, notice how each component is a function calling another function, and each new component is the third argument for the React.createElement function. Whenever you write a component, it’s useful to keep in mind that it’s a normal JavaScript function.
An important feature of React is that a component can have many children but only one parent. I found this a confusing until I realized it’s the same logic HTML has, where each element must be inside other elements, and can have many children. You can notice this in the code above, where there’s only one parent div containing all the children.
component’s props are the same as a function’s arguments
When using a function we can use arguments to share information with that function. For React components we call these arguments props (funny story, I didn’t realize props is short for properties for a long time).
Under the hood, props behave exactly like function arguments, the differences are that we interact with them through the nicer interface of JSX, and that React gives extra functionality to props such as children.
Creating a mental model around functions
Using this knowledge let’s craft a mental model to intuitively understand functions!
When I think about a function I imagine it as a box, and that box will do something whenever it’s called. It could return a value or not:
function sum(a, b) {
  return a + b;
}

console.log(sum(10, 20));

function logSum(a, b) {
  console.log(a + b);
}
Since a component is a fancy function, that makes a component a box as well, with props as the ingredients the box needs to create the output.
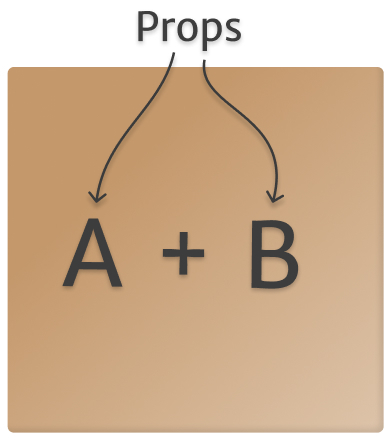
When a component is executed it will run whatever logic it has, if any, and evaluate its JSX. Any tags will become HTML and any component will be executed, and the process is repeated until reaching the last component in the chain of children.
Since a component can have many children but only one parent I imagine multiple components as a set of boxes, one inside another. Each box must be contained within a bigger box and can have many smaller boxes inside.

But the mental model of a box representing a component is not complete without understanding how it can interact with other boxes.
Closures are a core concept in JavaScript. They enable complex functionality in the language, they’re super important to understand to have a good mental model around React.
They’re also one of the features newcomers struggle with the most, so instead of explaining the technicalities I’ll demonstrate the mental model I have around closures.
The basic description of a closure is that it’s a function. I imagine it as a box that keeps what’s inside of it from spilling out, while allowing the things outside of it from entering, like a semi-permeable box. But spilling out where?
While the closure itself is a box, any closure will be inside bigger boxes, with the outermost box being the Window object.
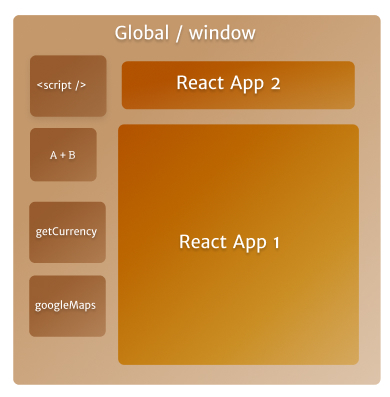
The window object encapsulates everything else
But what is a closure?
A closure is a feature of JavaScript functions. If you’re using a function, you’re using a closure.
As I’ve mentioned, a function is a box and that makes a closure a box too. Considering that each function can contain many others inside of it, then the closure is the ability of a function to use the information outside of it, while keeping the information it has inside from “spilling out”, or being used by the outer function.
Speaking in terms of my mental model: I imagine the functions as boxes within boxes, and each smaller box can see the information of the outer box, or parent, but the big box cannot see the smaller one’s information. That’s as simple and accurate an explanation of closures as I can make.
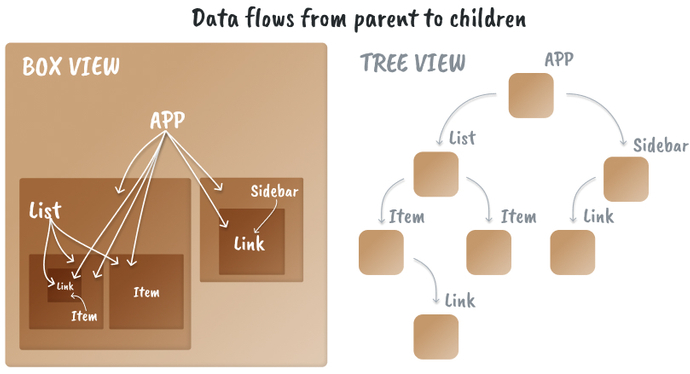
"Each function can only access its own 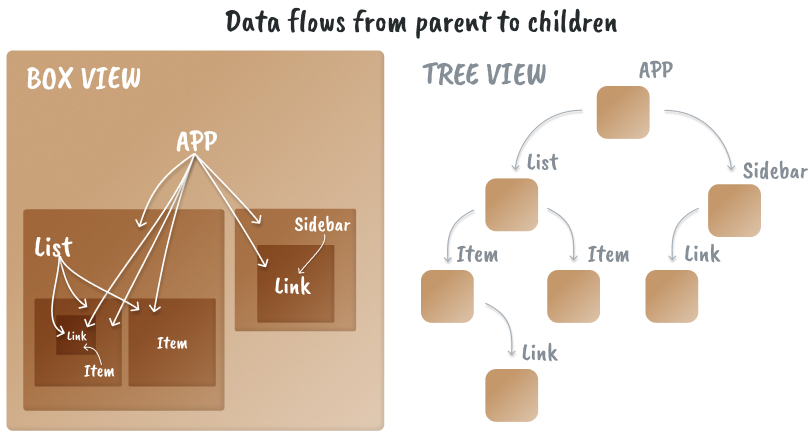
Each function can only access its own information and the parent’s
Closures are important because they can be exploited to create some powerful mechanics and React takes full advantage of this.
Closures in React
Each React component is also a closure. Within components, you can only pass props down from parent to child and the parent cannot see what’s inside the child, this is an intended feature to make our app’s data flow simpler to trace. To find where data comes from, we usually need to go up the tree to find which parent is sending it down.
A great example of closures in React is updating a parent’s state through a child component. You’ve probably done this without realizing you were messing around with closures.
To start, we know the parent can’t access the child’s information directly, but the child can access the parent’s. So we send down that info from parent to child through props. In this case, the information takes the shape of a function that updates the parent’s state.
const Parent = () => {
  const [count, setCount] = useState(0);

  return (
    <div>
      The count is {count}
      <div>
        <ChildButtons onClick={setCount} count={count} />
      </div>
    </div>
  );
};

const ChildButtons = (props) => (
  <div>
    <button onClick={() => props.onClick(props.count + 1)}>
      Increase count
    </button>
    <button onClick={() => props.onClick(props.count - 1)}>
      Decrease count
    </button>
  </div>
);
When an onClick happens in a button, that will execute the function received from props props.onClick, and update the value using props.count.
The insight here lies in the way we’re updating a parent’s state through a child, in this case, the props.onClick function. The reason this works is that the function was declared within the Parent component’s scope, within its closure, so it will have access to the parent’s information. Once that function is called in a child, it still lives in the same closure.
This can be hard to grasp, so the way I imagine it is as a “tunnel” between closures. Each has its own scope, but we can create a one-way communication tunnel that connects both.
Once we understand how closures affect our components, we can take the next big step: React state.
Fitting React’s State Into Our Mental Model
React’s philosophy is simple: it handles when and how to render elements, and developers control what to render. State is our tool to decide that what.
When state changes, its component renders and therefore re-executes all the code within. We do this to show new, updated information to the user.
In my mental model state is like a special property inside the box. It’s independent of everything else that happens within it. It will get a default value on the first render and always be up to date with the latest value.
Each variable and function is created on every render, which means their values are also brand new. Even if a variable’s value never changes, it is recalculated and reassigned every time. That’s not the case with state, it only changes when there’s a request for it to change via a set state event.
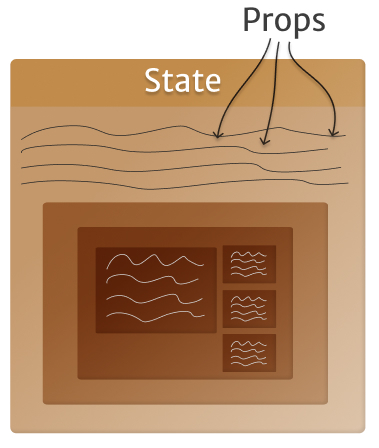
State is a special, independent part of the box; with props coming from outside
State follows a simple rule: Whenever it changes it will re-rendered the component and its children. Props follow the same logic, if a prop changes, the component will re-render, however, we can control state by modifying it, props are more static and usually change as a reaction to a state change.
the-rendering-mental-model-understanding-reacts-magic
The Rendering Mental Model: understanding React’s magic
I consider rendering to be React’s most confusing part because a lot of things happen during rendering that sometimes isn’t obvious by looking at the code. That’s why having a clear mental model helps.
The way I imagine rendering with my imaginary boxes is two-fold: the first render brings the box into existence, that’s when the state is initialized. The second part is when it re-renders, that’s the box being recycled, most of it is brand new but some important elements of it remain namely state.
On every render, everything inside a component is created, including variables and functions, that’s why we can have variables storing a calculation’s results, since they will be recalculated on every render. It’s also why functions are not reliable as values, due to their reference (the function’s value, per se) being different every render.
const Thumbnail = (props) => (
  <div>
    {props.withIcon && <AmazingIcon />}
    <img src={props.imgUrl} alt={props.alt} />
  </div>
);
The above will give a different result depending on the props the component receives. The reason React must re-render on every prop change is that it wants to keep the user up to date with the latest information.
However, the state doesn’t change on re-renders, its value is maintained. That’s why the box is “recycled” instead of created brand new every time. Internally, React is keeping track of each box and making sure its state is always consistent. That’s how React knows when to update a component.
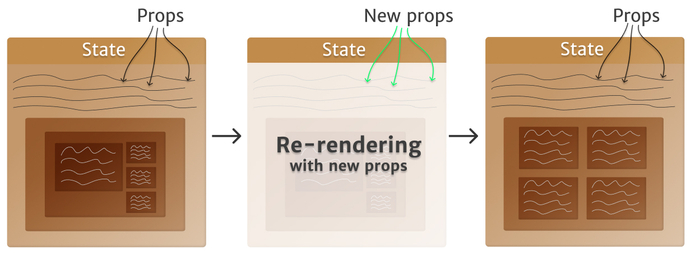
“When props (or state) changes, a new render happens and the component’s output can change”)]
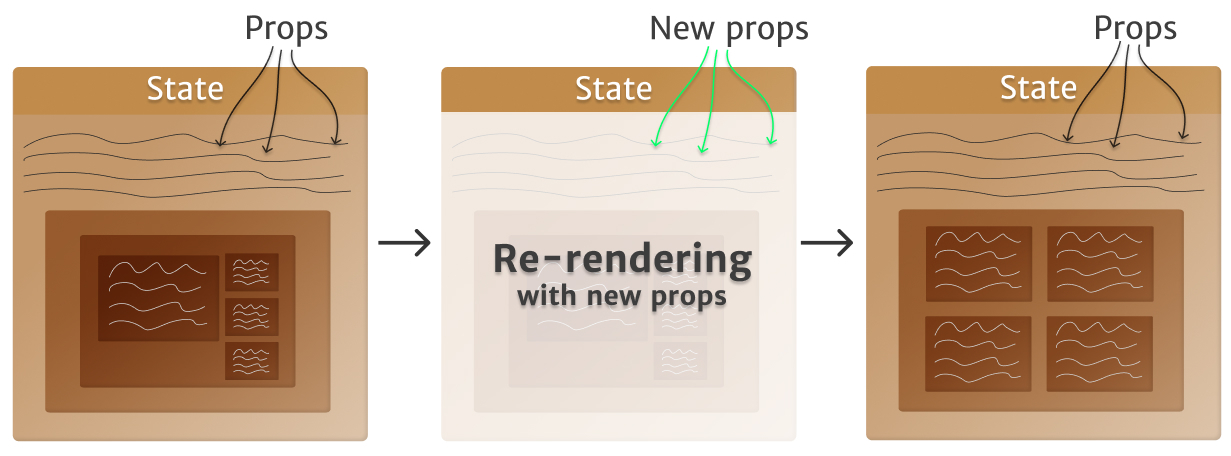
When props (or state) changes, a new render happens and the component’s output can change
By imagining a box being recycled I can understand what’s going on inside of it. For simple components, it’s easy to grasp, but the more complex a component becomes, the more props it receives, the more state it maintains, the more useful a clear mental model becomes.
A complete React mental model: Putting it all together.
Now that I’ve explained all the different parts of the puzzle separately, let’s put it all together. Here’s the complete mental model I use for React components, directly translated from how I imagine them into words.
I imagine a React component as a box that contains all of its information within its walls, including its children, which are more boxes.
And like a box in the real world, it can have other boxes inside of it and these boxes can, in turn, contain more boxes. That way each box/component must have a single parent, and a parent can have many children.
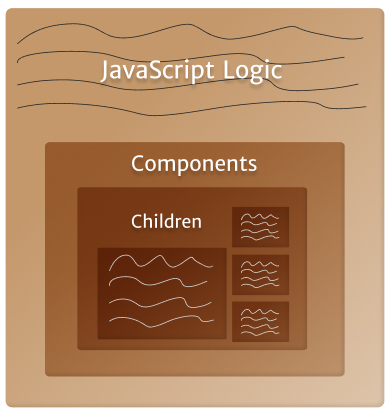
The basic representation of a React component
The boxes are semi-permeable, meaning they never leak anything to the outside but can use information from the outside as if it belonged to them. I imagine like this to represent how closures work in JavaScript.
In React the way to share information between components is called props, the same idea applies to function and then it’s called arguments, they both work in the same way but with a different syntax.
Within components, information can only travel down from parents to children. In other words, children can access their parent’s data and state, but not the other way around, and the way we share that information is through props.
I imagine this directional sharing of information as boxes within boxes. With the inner-most box being able to absorb the parent’s data.
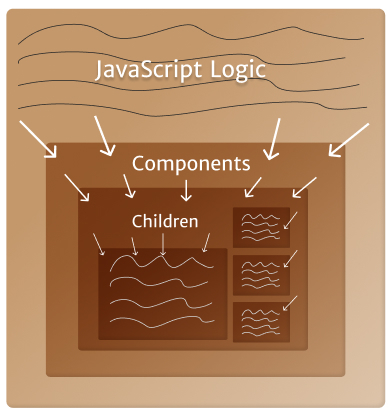
Data is shared from parent to child
The box must first be created though, and this happens on render, where the default value is given to state and just like with functions, all the code within the component is executed. In my mental model, this is equivalent to the box being created.
Subsequent renders, or re-renders, execute all the code in the component again, recalculating variables, recreating functions, and so on. Everything except for state is brand new on each render. State’s value is maintained across renders is updated only through a set method.
In my mental model, I see re-rendering as recycling the box since most of it is recreated, but it’s still the same box due to React keeping track of the component’s state.
When a box is recycled all the boxes within it, its children, are also recycled. This can happen because the component’s state was modified or a prop changed.
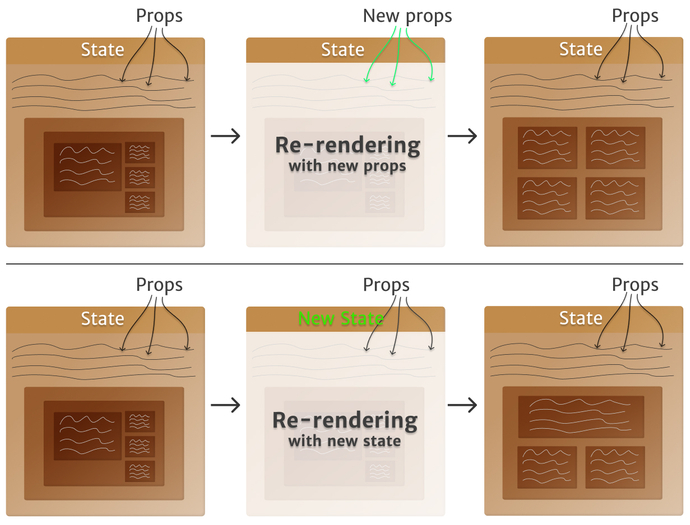
Mental model of a React component re-rendering when props or state change
Remember that a state or prop changing means the information the user sees is outdated, and React always wants to keep the UI updated so it re-renders the component that must show the new data.
By using these mental models I feel confident when working with React. They help me visualize what can be a maze of code into a comprehensive mental map. It also demystifies React and brings it to a level I’m much more comfortable with.
React is not that complex once you start understanding the core principles behind it and create some ways to imagine how your code works.
Cheatsheet
/* *******************************************************************************************
 * REACT.JS CHEATSHEET
 * DOCUMENTATION: https://reactjs.org/docs/
 * FILE STRUCTURE: https://reactjs.org/docs/faq-structure.html
 * ******************************************************************************************* */
```bash

npm install --save react // declarative and flexible JavaScript library for building UI
npm install --save react-dom // serves as the entry point of the DOM-related rendering paths
npm install --save prop-types // runtime type checking for React props and similar objects
// notes: don't forget the command lines


/* *******************************************************************************************
 * REACT
 * https://reactjs.org/docs/react-api.html
 * ******************************************************************************************* */


// Create and return a new React element of the given type.
// Code written with JSX will be converted to use React.createElement().
// You will not typically invoke React.createElement() directly if you are using JSX.
React.createElement(
  type,
  [props],
  [...children]
)

// Clone and return a new React element using element as the starting point.
// The resulting element will have the original element’s props with the new props merged in shallowly.
React.cloneElement(
  element,
  [props],
  [...children]
)

// Verifies the object is a React element. Returns true or false.
React.isValidElement(object)

React.Children  // provides utilities for dealing with the this.props.children opaque data structure.

// Invokes a function on every immediate child contained within children with this set to thisArg.
React.Children.map(children, function[(thisArg)])

// Like React.Children.map() but does not return an array.
React.Children.forEach(children, function[(thisArg)])

// Returns the total number of components in children,
// equal to the number of times that a callback passed to map or forEach would be invoked.
React.Children.count(children)

// Verifies that children has only one child (a React element) and returns it.
// Otherwise this method throws an error.
React.Children.only(children)

// Returns the children opaque data structure as a flat array with keys assigned to each child.
// Useful if you want to manipulate collections of children in your render methods,
// especially if you want to reorder or slice this.props.children before passing it down.
React.Children.toArray(children)

// The React.Fragment component lets you return multiple elements in a render() method without creating an additional DOM element
// You can also use it with the shorthand <></> syntax.
React.Fragment


/* *******************************************************************************************
 * REACT.COMPONENT
 * React.Component is an abstract base class, so it rarely makes sense to refer to React.Component
 * directly. Instead, you will typically subclass it, and define at least a render() method.
 * https://reactjs.org/docs/react-component.html
 * ******************************************************************************************* */


class Component extends React.Component {
  // Will be called before it is mounted
  constructor(props) {
    // Call this method before any other statement
    // or this.props will be undefined in the constructor
    super(props);

    // The constructor is also often used to bind event handlers to the class instance.
    // Binding makes sure the method has access to component attributes like this.props and this.state
    this.method = this.method.bind(this);

    // The constructor is the right place to initialize state.
    this.state = {
      active: true,

      // In rare cases, it’s okay to initialize state based on props.
      // This effectively “forks” the props and sets the state with the initial props.
      // If you “fork” props by using them for state, you might also want to implement componentWillReceiveProps(nextProps)
      // to keep the state up-to-date with them. But lifting state up is often easier and less bug-prone.
      color: props.initialColor
    };
  }

  // Enqueues changes to the component state and
  // tells React that this component and its children need to be re-rendered with the updated state.
  // setState() does not always immediately update the component. It may batch or defer the update until later.
  // This makes reading this.state right after calling setState() a potential pitfall.
  // Instead, use componentDidUpdate or a setState callback.
  // You may optionally pass an object as the first argument to setState() instead of a function.
  setState(updater[, callback]) { }

  // Invoked just before mounting occurs (before render())
  // This is the only lifecycle hook called on server rendering.
  componentWillMount() { }

  // Invoked immediately after a component is mounted.
  // Initialization that requires DOM nodes should go here.
  // If you need to load data from a remote endpoint, this is a good place to instantiate the network request.
  // This method is a good place to set up any subscriptions. If you do that, don’t forget to unsubscribe in componentWillUnmount().
  componentDidMount() { }

  // Invoked before a mounted component receives new props.
  // If you need to update the state in response to prop changes (for example, to reset it),
  // you may compare this.props and nextProps and perform state transitions using this.setState() in this method.
  componentWillReceiveProps(nextProps) { }

  // Let React know if a component’s output is not affected by the current change in state or props.
  // The default behavior is to re-render on every state change, and in the vast majority of cases you should rely on the default behavior.
  // shouldComponentUpdate() is invoked before rendering when new props or state are being received. Defaults to true.
  // This method is not called for the initial render or when forceUpdate() is used.
  // Returning false does not prevent child components from re-rendering when their state changes.
  shouldComponentUpdate(nextProps, nextState) { }

  // Invoked just before rendering when new props or state are being received.
  // Use this as an opportunity to perform preparation before an update occurs. This method is not called for the initial render.
  // Note that you cannot call this.setState() here; nor should you do anything else
  // (e.g. dispatch a Redux action) that would trigger an update to a React component before componentWillUpdate() returns.
  // If you need to update state in response to props changes, use componentWillReceiveProps() instead.
  componentWillUpdate(nextProps, nextState) { }

  // Invoked immediately after updating occurs. This method is not called for the initial render.
  // Use this as an opportunity to operate on the DOM when the component has been updated.
  // This is also a good place to do network requests as long as you compare the current props to previous props (e.g. a network request may not be necessary if the props have not changed).
  componentDidUpdate(prevProps, prevState) { }

  // Invoked immediately before a component is unmounted and destroyed.
  // Perform any necessary cleanup in this method, such as invalidating timers, canceling network requests,
  // or cleaning up any subscriptions that were created in componentDidMount().
  componentWillUnmount() { }

  // Error boundaries are React components that catch JavaScript errors anywhere in their child component tree,
  // log those errors, and display a fallback UI instead of the component tree that crashed.
  // Error boundaries catch errors during rendering, in lifecycle methods, and in constructors of the whole tree below them.
  componentDidCatch() { }

  // This method is required.
  // It should be pure, meaning that it does not modify component state,
  // it returns the same result each time it’s invoked, and
  // it does not directly interact with the browser (use lifecycle methods for this)
  // It must return one of the following types: react elements, string and numbers, portals, null or booleans.
  render() {
    // Contains the props that were defined by the caller of this component.
    console.log(this.props);

    // Contains data specific to this component that may change over time.
    // The state is user-defined, and it should be a plain JavaScript object.
    // If you don’t use it in render(), it shouldn’t be in the state.
    // For example, you can put timer IDs directly on the instance.
    // Never mutate this.state directly, as calling setState() afterwards may replace the mutation you made.
    // Treat this.state as if it were immutable.
    console.log(this.state);

    return (
      <div>
        {/* Comment goes here */}
        Hello, {this.props.name}!
      </div>
    );
  }
}

// Can be defined as a property on the component class itself, to set the default props for the class.
// This is used for undefined props, but not for null props.
Component.defaultProps = {
  color: 'blue'
};

component = new Component();

// By default, when your component’s state or props change, your component will re-render.
// If your render() method depends on some other data, you can tell React that the component needs re-rendering by calling forceUpdate().
// Normally you should try to avoid all uses of forceUpdate() and only read from this.props and this.state in render().
component.forceUpdate(callback)


/* *******************************************************************************************
 * REACT.DOM
 * The react-dom package provides DOM-specific methods that can be used at the top level of
 * your app and as an escape hatch to get outside of the React model if you need to.
 * Most of your components should not need to use this module.
 * https://reactjs.org/docs/react-dom.html
 * ******************************************************************************************* */


// Render a React element into the DOM in the supplied container and return a reference
// to the component (or returns null for stateless components).
ReactDOM.render(element, container[, callback])

// Same as render(), but is used to hydrate a container whose HTML contents were rendered
// by ReactDOMServer. React will attempt to attach event listeners to the existing markup.
ReactDOM.hydrate(element, container[, callback])

// Remove a mounted React component from the DOM and clean up its event handlers and state.
// If no component was mounted in the container, calling this function does nothing.
// Returns true if a component was unmounted and false if there was no component to unmount.
ReactDOM.unmountComponentAtNode(container)

// If this component has been mounted into the DOM, this returns the corresponding native browser
// DOM element. This method is useful for reading values out of the DOM, such as form field values
// and performing DOM measurements. In most cases, you can attach a ref to the DOM node and avoid
// using findDOMNode at all.
ReactDOM.findDOMNode(component)

// Creates a portal. Portals provide a way to render children into a DOM node that exists outside
// the hierarchy of the DOM component.
ReactDOM.createPortal(child, container)


/* *******************************************************************************************
 * REACTDOMSERVER
 * The ReactDOMServer object enables you to render components to static markup.
 * https://reactjs.org/docs/react-dom.html
 * ******************************************************************************************* */


// Render a React element to its initial HTML. React will return an HTML string.
// You can use this method to generate HTML on the server and send the markup down on the initial
// request for faster page loads and to allow search engines to crawl your pages for SEO purposes.
ReactDOMServer.renderToString(element)

// Similar to renderToString, except this doesn’t create extra DOM attributes that React uses
// internally, such as data-reactroot. This is useful if you want to use React as a simple static
// page generator, as stripping away the extra attributes can save some bytes.
ReactDOMServer.renderToStaticMarkup(element)

// Render a React element to its initial HTML. Returns a Readable stream that outputs an HTML string.
// The HTML output by this stream is exactly equal to what ReactDOMServer.renderToString would return.
// You can use this method to generate HTML on the server and send the markup down on the initial
// request for faster page loads and to allow search engines to crawl your pages for SEO purposes.
ReactDOMServer.renderToNodeStream(element)

// Similar to renderToNodeStream, except this doesn’t create extra DOM attributes that React uses
// internally, such as data-reactroot. This is useful if you want to use React as a simple static
// page generator, as stripping away the extra attributes can save some bytes.
ReactDOMServer.renderToStaticNodeStream(element)


/* *******************************************************************************************
 * TYPECHECKING WITH PROPTYPES
 * https://reactjs.org/docs/typechecking-with-proptypes.html
 * ******************************************************************************************* */


import PropTypes from 'prop-types';

MyComponent.propTypes = {
  // You can declare that a prop is a specific JS type. By default, these
  // are all optional.
  optionalArray: PropTypes.array,
  optionalBool: PropTypes.bool,
  optionalFunc: PropTypes.func,
  optionalNumber: PropTypes.number,
  optionalObject: PropTypes.object,
  optionalString: PropTypes.string,
  optionalSymbol: PropTypes.symbol,

  // Anything that can be rendered: numbers, strings, elements or an array
  // (or fragment) containing these types.
  optionalNode: PropTypes.node,

  // A React element.
  optionalElement: PropTypes.element,

  // You can also declare that a prop is an instance of a class. This uses
  // JS's instanceof operator.
  optionalMessage: PropTypes.instanceOf(Message),

  // You can ensure that your prop is limited to specific values by treating
  // it as an enum.
  optionalEnum: PropTypes.oneOf(['News', 'Photos']),

  // An object that could be one of many types
  optionalUnion: PropTypes.oneOfType([
    PropTypes.string,
    PropTypes.number,
    PropTypes.instanceOf(Message)
  ]),

  // An array of a certain type
  optionalArrayOf: PropTypes.arrayOf(PropTypes.number),

  // An object with property values of a certain type
  optionalObjectOf: PropTypes.objectOf(PropTypes.number),

  // An object taking on a particular shape
  optionalObjectWithShape: PropTypes.shape({
    color: PropTypes.string,
    fontSize: PropTypes.number
  }),

  // You can chain any of the above with `isRequired` to make sure a warning
  // is shown if the prop isn't provided.
  requiredFunc: PropTypes.func.isRequired,

  // A value of any data type
  requiredAny: PropTypes.any.isRequired,

  // You can also specify a custom validator. It should return an Error
  // object if the validation fails. Don't `console.warn` or throw, as this
  // won't work inside `oneOfType`.
  customProp: function(props, propName, componentName) {
    if (!/matchme/.test(props[propName])) {
      return new Error(
        'Invalid prop `' + propName + '` supplied to' +
        ' `' + componentName + '`. Validation failed.'
      );
    }
  },

  // You can also supply a custom validator to `arrayOf` and `objectOf`.
  // It should return an Error object if the validation fails. The validator
  // will be called for each key in the array or object. The first two
  // arguments of the validator are the array or object itself, and the
  // current item's key.
  customArrayProp: PropTypes.arrayOf(function(propValue, key, componentName, location, propFullName) {
    if (!/matchme/.test(propValue[key])) {
      return new Error(
        'Invalid prop `' + propFullName + '` supplied to' +
        ' `' + componentName + '`. Validation failed.'
      );
    }
  })
};